
Discover the essential steps to efficiently build a kitchen sink cabinet with our comprehensive guide. Crafting your own kitchen sink cabinet not only enhances the functionality of your space but also adds a personalized touch to your home. From maximizing storage capacity to customizing the design according to your preferences, constructing a cookhouse chiffonier empowers you to tailor your kitchen layout to suit your needs perfectly. With our easy-to-follow instructions and tips, you can embark on this project with confidence, creating a durable and stylish cabinet that elevates the heart of your home. Unlock the potential of your kitchen space today as we delve into the intricacies of how to build a kitchen sink cabinet.
What Are The Basic Tools Needed To Build A Kitchen Sink Cabinet?

To build a kitchen sink cabinet, you will need a few basic tools to ensure the project is completed successfully. The essential tools include a tape measure, drill, screwdriver, level, hammer, saw, and safety goggles. These tools will help you accurately measure and cut the materials needed for the chiffonier construction, as well as assemble and install the chiffonier securely.
Do I Need Special Skills To Build A Kitchen Sink?

Building a kitchen sink does require some level of skill and knowledge in woodworking and carpentry. While it may not necessarily require special skills, having experience with using tools such as saws, drills, and measuring instruments will be beneficial. Understanding the basic principles of cabinet construction, including proper measurements, material selection, and assembly techniques, is essential to ensure a functional and durable end product.
Wood Selection
Wood selection plays a pivotal role in the construction of a cookhouse sink cabinet, as it determines the cabinet’s durability, aesthetic appeal, and overall quality. When selecting wood for your chiffonier, opt for sturdy and moisture-resistant varieties such as oak, maple, or birch. These hardwoods are ideal for kitchen environments where exposure to water and humidity is common, ensuring that your chiffonier withstands the test of time. Additionally, consider the grain pattern and color of the wood to complement the design of your kitchen. By carefully choosing the right wood, you can create a chiffonier that not only meets your functional needs but also enhances the visual appeal of your space.
Hardware And Fasteners
The reliability and functionality of your cookhouse sink cabinet hinge on the selection of appropriate hardware and fasteners. Investing in high-quality hinges, drawer slides, and handles not only enhances the aesthetic appeal but also ensures smooth operation and longevity. Stainless steel hardware stands out for its corrosion resistance, ideal for withstanding the damp environment of a kitchen. When it comes to fasteners, opting for screws and bolts designed for cabinetry offers superior strength and stability. Additionally, utilizing a combination of screws, wood glue, and dowels during assembly reinforces the structural integrity of the chiffonier, guaranteeing it can withstand the weight of a sink and daily use without faltering.
Measuring And Cutting The Wood
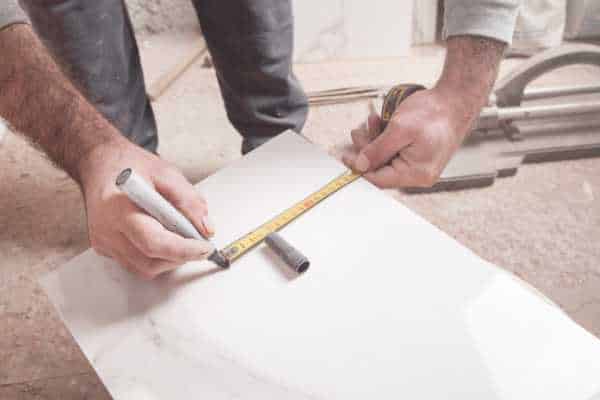
Precision is paramount when measuring and cutting the wood for your cookhouse sink chiffonier to achieve seamless assembly and a professional finish. Begin by meticulously measuring the dimensions of the cabinet space, considering factors such as the sink size and any additional features like drawers or shelves. Accurate measurements serve as the foundation for precise cuts, minimizing wastage and ensuring each component fits snugly together. Utilizing quality measuring tools such as a tape measure, square, and level guarantees consistency and accuracy throughout the construction process. Employing a table saw, circular saw, or jigsaw equipped with a fine-tooth blade facilitates clean, straight cuts, allowing you to achieve the desired dimensions with ease and precision.
Assembling The Cabinet Frame

Assembling the cabinet frame is a critical step in the construction process, determining the structural integrity and stability of the final product. Begin by laying out the cut wood pieces according to the chiffonier design, ensuring all components are properly aligned and oriented. Utilize clamps to secure the pieces in place before joining them using screws, wood glue, or dowels. Pay close attention to the squareness of the frame, verifying that all corners form right angles to prevent misalignment or instability. Reinforce the joints by countersinking screws or adding corner braces for added support and rigidity. As the foundation of your cookhouse sink chiffonier, a well-constructed frame guarantees a solid base for mounting the sink and accommodating additional features like shelves or drawers.
Installing The Sink Basin
Installing the sink basin is a crucial step in building a kitchen sink chiffonier, as it determines the functionality and efficiency of the entire unit. Begin by measuring the dimensions of your chosen sink basin to ensure a precise fit within the cabinet. Once you have the measurements, carefully cut an opening in the top panel of the chiffonier to accommodate the sink. Be sure to follow the manufacturer’s instructions for proper installation, including securing the sink in place with brackets or adhesive. Properly installing the sink basin ensures a seamless integration with the chiffonier, preventing leaks and providing a stable foundation for your kitchen sink.
Budget-Friendly Alternatives For Diyers
A cost-effective solution for DIYers looking to build a corner kitchen cabinet is to utilize ready-to-assemble furniture components. These pre-cut pieces can be easily assembled at home with basic tools, saving both time and money. Another budget-friendly alternative is to repurpose old furniture or chiffoniers by transforming them into a custom corner chiffonier. By sanding, painting, and adding new hardware, you can create a unique piece that fits perfectly in your space while being kind to your wallet.
Mounting Drawer Front
Mounting the drawer front is a crucial step in the construction of a sink chiffonier, as it not only enhances the cabinet’s aesthetic appeal but also facilitates smooth and seamless operation. Begin by aligning the drawer front with the chiffonier frame, ensuring equal spacing on all sides for a balanced and symmetrical look. Secure the drawer front in place using screws or adhesive, taking care to maintain proper alignment throughout the mounting process. Test the drawer’s functionality by opening and closing it multiple times, making any necessary adjustments to ensure smooth operation. Additionally, consider adding drawer pulls or handles to enhance accessibility and convenience. With precision and attention to detail, mounting the drawer front transforms your kitchen sink chiffonier into a cohesive and visually appealing element of your culinary space.
Connecting The Plumbing Fixtures
Connecting the plumbing fixtures to your kitchen sink cabinet is a critical step in ensuring proper functionality and efficiency. Begin by installing the faucet onto the sink basin according to the manufacturer’s instructions, ensuring a tight and secure connection. Next, attach the water supply lines to the faucet, making sure to tighten them securely to prevent any leaks. Connect the drain assembly to the sink basin, ensuring that it aligns properly with the drainage hole. Use plumber’s tape or silicone sealant to seal any connections and prevent leaks. Once all the plumbing fixtures are properly connected, test the system by running water through the faucet and checking for any leaks or drainage issues. Adjust as needed to ensure optimal performance and functionality.
Ensuring Proper Ventilation
Proper ventilation is essential for maintaining a healthy and functional kitchen environment, especially when installing a sink chiffonier. Adequate ventilation helps to prevent moisture buildup, which can lead to mold and mildew growth, as well as damage to the cabinet and surrounding materials. Ensure that your cookhouse sink chiffonier is properly ventilated by installing ventilation grilles or vents along the back or bottom of the chiffonier. This allows air to circulate freely, helping to remove excess moisture and odors from the space. Additionally, consider installing a ventilation fan or range hood above the sink area to further improve air circulation and remove cooking fumes and odors. By ensuring proper ventilation, you can create a clean, comfortable, and healthy kitchen environment for you and your family to enjoy.
The Final Thought
Building a kitchen sink cabinet is a manageable DIY project that can greatly improve the functionality and aesthetics of your kitchen space. By carefully following the steps outlined in this guide, you can create a custom chiffonier that meets your specific needs and design preferences. Remember to take accurate measurements, choose high-quality materials, and pay attention to detail during the construction process. With patience and dedication, you can successfully complete this project and enjoy the satisfaction of a well-crafted cookhouse sink chiffonier. Start planning and gather your tools to begin transforming your kitchen today.