
Cutting foam insulation board is a crucial step in many home improvement and construction projects, ensuring proper fit and optimal insulation. If you’re wondering how to cut foam insulation board effectively, you’ve come to the right place. In this guide, we’ll walk you through the best techniques, tools, and tips to achieve clean, precise cuts with ease. Whether you’re working on insulating walls, floors, or ceilings, learning the right approach will save you time and materials. From selecting the right tools to ensuring accurate measurements, follow our step-by-step instructions to tackle your next insulation project with confidence and professionalism.
Understanding Foam Insulation Boards
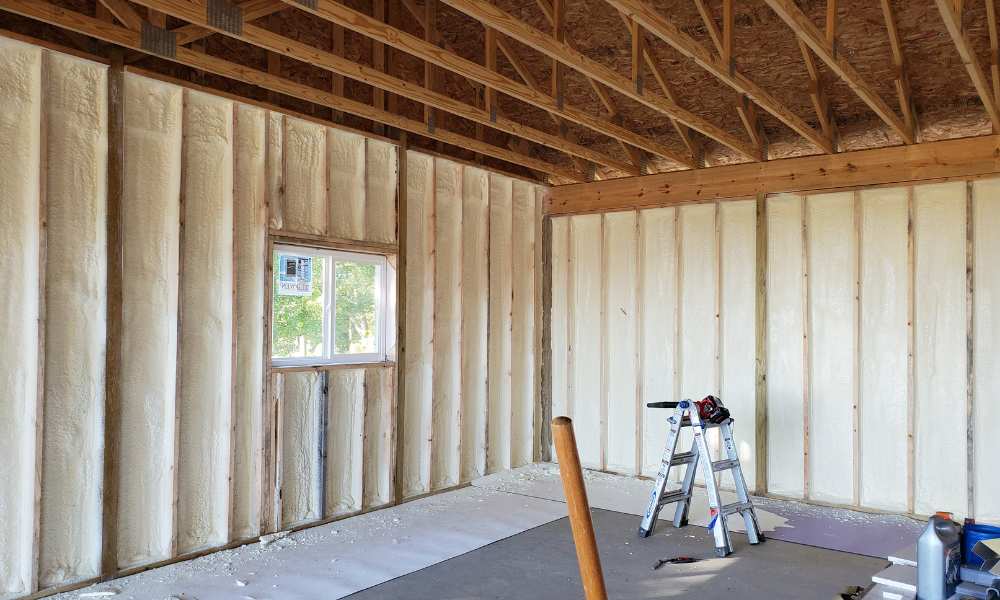
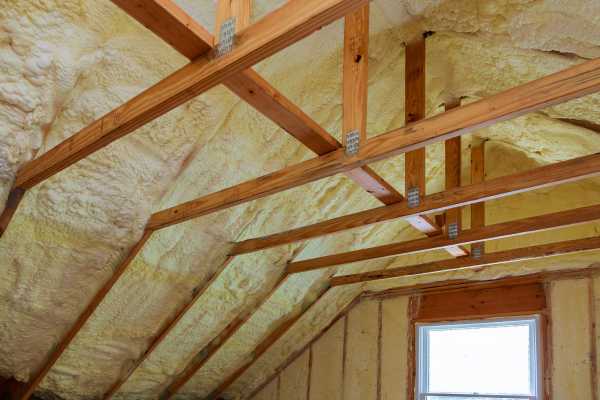
Foam insulation boards are rigid panels made from various types of foam that provide excellent thermal insulation for buildings. Commonly used in walls, ceilings, and floors, these boards help maintain comfortable indoor temperatures and reduce energy costs. The most prevalent types of foam insulation boards include polystyrene, polyisocyanurate, and extruded polystyrene, each offering unique benefits. Polystyrene is cost-effective and moisture-resistant, while polyisocyanurate boasts higher R-values for improved insulation performance. Extruded polystyrene is known for its durability and water resistance. By using foam insulation boards, homeowners and builders can enhance energy efficiency, minimize heat loss, and create a more comfortable living environment.
Why Accurate Cutting Is Important
Accurate cutting of foam insulation boards is essential for achieving a snug fit, which maximizes insulation effectiveness. When foam boards are cut correctly, they fill spaces tightly, preventing air leaks and enhancing energy efficiency in your home. Conversely, improper cuts can lead to significant challenges. Gaps may form between boards, allowing drafts and moisture to compromise the insulation’s performance. Additionally, wasted materials can result in increased costs and project delays. Poorly cut boards can also diminish the overall quality of insulation, leading to higher energy bills and reduced comfort. Therefore, mastering the cutting process is crucial for any insulation project.
Tools You’ll Need for Cutting

Mastering how to cut foam insulation board, having the right tools is crucial for achieving clean and precise cuts. Begin with a **utility knife**, perfect for scoring the foam before snapping it. A **straight edge** serves as a guide for making straight cuts, ensuring accuracy. Use a **measuring tape** to get the board’s dimensions right, and a **marker** to clearly outline your cutting lines. For intricate shapes or thicker boards, a **hot wire cutter** is an excellent choice, providing a clean finish without fraying. Lastly, don’t forget to wear **safety glasses** and **gloves** for protection while you work. With these tools, you’ll be set for a successful cutting experience.
Safety Precautions Before You Begin
Before you start cut foam insulation board, it’s essential to prioritize safety. Always wear safety glasses to shield your eyes from dust and particles that can become airborne during the cutting process. Gloves are crucial as they provide protection for your hands against sharp edges and accidental cuts. Additionally, wearing a dust mask can help prevent inhalation of any foam dust generated while working. Ensuring a safe workspace by keeping the area clean and organized will further minimize risks. By following these safety precautions, you can work confidently and efficiently, reducing the likelihood of accidents and injuries during your insulation project.
Step-by-Step Guide: How to Cut Foam Insulation Boards
Cutting foam insulation boards can be straightforward with the right approach. Start by measuring and marking the board accurately, ensuring your dimensions fit the intended space. Use a straightedge to create a guide for cutting. Next, score the marked line with a utility knife, applying steady pressure to penetrate the foam without cutting all the way through. After scoring, gently snap the board along the scored line for a clean break. If any rough edges remain, use sandpaper to smooth them out, ensuring a perfect fit for your insulation project. Following these steps will help achieve precise cuts and enhance your overall results.
Cutting Foam Boards with Different Tools
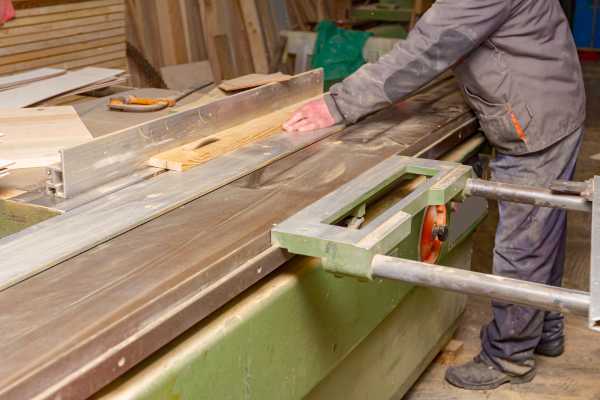
When cutting foam insulation boards, various tools can help achieve precise results. A handsaw is ideal for thicker foam, providing clean cuts without damaging the material. For more intricate shapes or curves, a jigsaw excels, allowing for greater maneuverability. If you need a smooth finish, consider using a hot wire cutter, which melts through the foam, producing clean edges and minimizing dust. While a utility knife is excellent for straight cuts and thinner boards, these alternatives offer flexibility for different cutting needs. After cutting, don’t forget to sand or smooth the edges to ensure a perfect fit during installation, enhancing the insulation’s effectiveness.
Tips for Ensuring Clean and Precise Cuts
To achieve clean and precise cuts when working with foam insulation board, it’s essential to follow a few practical tips. First, ensure you measure and mark your cuts accurately before beginning. When cutting, use a straight edge as a guide to maintain a straight line. Avoid applying too much pressure, as this can cause jagged edges or uneven cuts. Always support the foam board adequately during cutting to prevent bending or breaking. After scoring the foam, snap it gently along the cut line for a clean break. Finally, consider sanding or smoothing the edges if necessary for a polished finish, enhancing both appearance and performance.
Working with Large Foam Boards
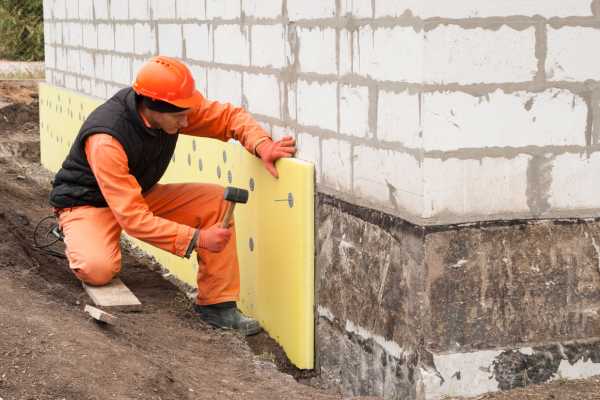
Working with large foam insulation boards can be challenging, but with the right techniques, you can achieve clean and accurate cuts. First, ensure you have a spacious, flat work area to prevent the board from bending or warping. Use a straight edge or guide to mark your cut line, which will help maintain precision. For stabilization, consider securing the foam board with clamps or placing it on a sturdy sawhorse. This prevents movement while cutting. If you need to make intricate cuts, using a hot wire cutter can provide better control. Following these methods will streamline your process and enhance your results.
Dealing with Curves and Complex Shapes
Cutting foam insulation boards into curves or complex shapes can be challenging, but with the right strategies, it becomes manageable. One effective approach is to use templates made from cardboard or paper. First, draw the desired shape on the template, cut it out, and then trace it onto the froth board. This ensures accuracy and consistency in your cuts. For intricate shapes, consider using a hot wire cutter or a jigsaw, as these tools offer better control and cleaner edges than a utility knife. Using templates or guides is essential for achieving professional-looking results, making your lining projects easier and more precise.
How to Dispose of Foam Insulation Scraps
Disposing of foam insulation scraps responsibly is essential for environmental sustainability. Many froth lining boards can be recycled, but it varies by type. Check with your local recycling center to confirm if they accept polystyrene or polyisocyanurate froth. If recycling isn’t an option, consider reusing scraps for DIY projects, such as crafting or lining in smaller spaces. If disposal is necessary, place the froth in a designated waste bag to prevent littering. Always follow local regulations regarding disposal to ensure eco-friendly practices. By taking these steps, you contribute to a greener planet while effectively managing your froth lining waste.
Conclusion
Mastering how to cut foam insulation board is essential for achieving precise and effective lining in your home improvement projects. By following the techniques outlined in this guide, you can ensure clean cuts, whether you’re tackling straight edges or complex shapes. Remember to utilize the right tools and safety measures to enhance your efficiency and protect yourself during the process. Additionally, responsibly disposing of any leftover froth scraps will contribute to eco-friendly practices. With these strategies in hand, you’re well-equipped to handle froth insulation boards confidently, improving your project’s quality and performance while making a positive impact on the environment.