
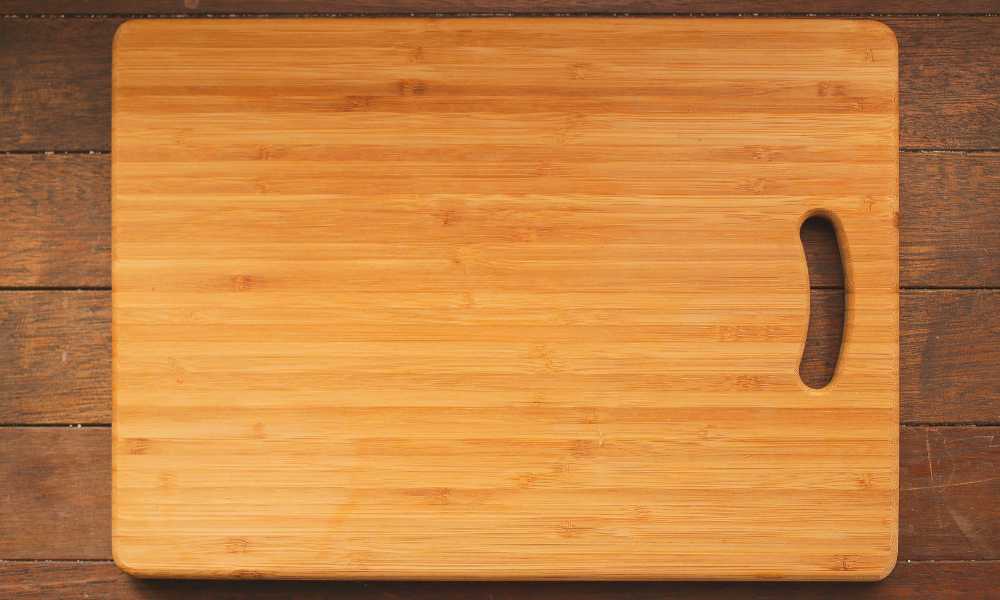
Finishing a cutting board is essential for both its durability and appearance, ensuring that it stays functional and beautiful for years to come. In this guide on *how to finish cutting board*, you’ll learn step-by-step techniques to protect your board from moisture, bacteria, and wear. Whether you’re using it daily or as a decorative piece, a properly finished cutting board will enhance your kitchen. From selecting the right food-safe oils to mastering the polishing process, we cover everything you need to know. Discover how to give your cutting board the perfect finish that will keep it looking pristine and lasting longer with minimal maintenance.
Materials and Tools Required
To finish your cutting board effectively, you’ll need the right materials and tools. Essential items include sandpaper (ranging from coarse to fine grits), a sanding block for even surface smoothing, and a clean cloth for applying the finish. You’ll also need food-safe oil such as mineral oil or linseed oil, and beeswax for added protection and shine. A brush can help apply these products evenly. It’s crucial to use food-safe oils and waxes to ensure safety and compliance with health standards, especially since cutting boards come into direct contact with food. Proper tools and materials make the finishing process smoother and more efficient.
Types of Wood for Cutting Boards
Choosing the right wood is crucial when finishing a cutting board. Maple, walnut, and cherry are among the best options. Maple, with its hardness and fine grain, is durable and highly resistant to knife marks. Walnut offers a darker appearance with a balance of hardness and workability, adding a stylish touch. Cherry, known for its warm color, deepens over time and provides a smooth surface. The type of wood impacts the finishing process—hardwoods like maple require more sanding for a smooth finish, while softer woods like cherry absorb oils faster. Selecting the right wood ensures your cutting board lasts longer and looks great with proper finishing.
Prepping the Cutting Board
Before finishing a cutting board, proper preparation is crucial for achieving a smooth, long-lasting result. Begin by thoroughly cleaning the board with warm water and mild soap to remove any debris or food particles. Allow it to dry completely, as moisture can affect the finishing process. Once dry, inspect the board for rough spots or imperfections. Use fine-grit sandpaper to smooth the surface, ensuring an even texture. Wipe off any dust with a clean, dry cloth. This step ensures the cutting board is clean, dry, and ready to absorb oils or finishes evenly, resulting in a more durable and attractive final product.
Sanding the Cutting Board
Sanding is a crucial step in the process of finishing a cutting board. Begin with coarse-grit sandpaper, such as 80 or 100 grit, to remove any rough spots or uneven surfaces. Gradually work your way to finer grits, like 220 or higher, to create a smooth, polished surface. A smooth surface is essential as it allows the finish, whether oil or wax, to penetrate evenly, providing better protection and enhancing the board’s appearance. Proper sanding not only ensures a better finish but also makes the board easier to clean and maintain over time, increasing its durability and resistance to moisture.
Choosing the Right Oil
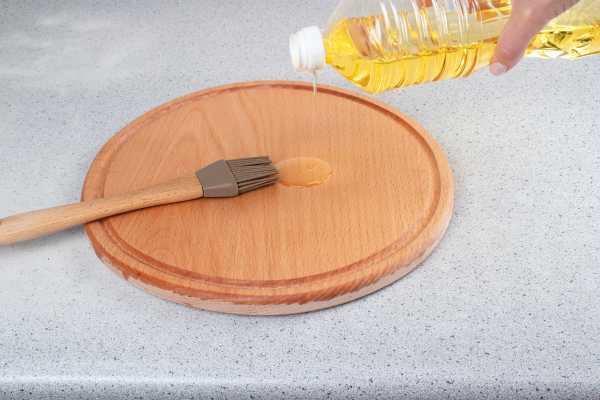
Choosing the right oil is crucial when finishing a cutting board. Food-safe options include mineral oil, linseed oil, and coconut oil. Mineral oil is popular for its affordability and easy absorption, making it ideal for frequent reapplications. Linseed oil offers a durable, long-lasting finish but takes longer to dry and may darken the wood over time. Coconut oil provides a natural, antibacterial finish but can sometimes go rancid if not properly stored. The best oil depends on your board’s wood type and how often it’s used. For a low-maintenance option, mineral oil is ideal, while linseed oil offers greater durability for those seeking long-term protection.
Applying the Oil
To apply oil to your cutting board, start by selecting a food-safe oil like mineral or walnut oil. Pour a small amount onto the surface and use a clean cloth to spread it evenly across the board, ensuring full coverage. Rub the oil in circular motions, working it into the wood grain. Pay extra attention to the edges and any end grains, as they tend to absorb more. Let the oil soak for at least 20-30 minutes, then wipe off any excess. For deeper absorption, allow the board to sit overnight before using. Repeat this process every few weeks to keep your cutting board well-maintained and protected.
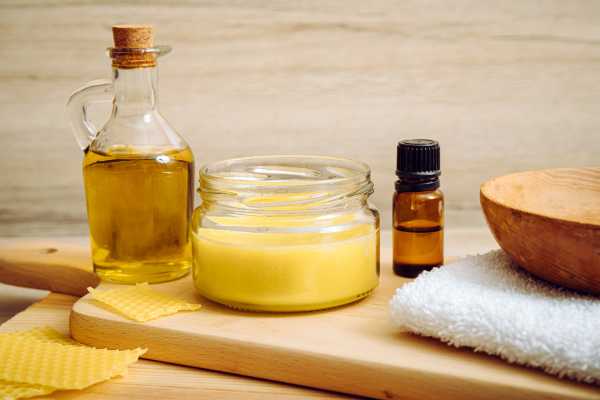
Polishing with Beeswax
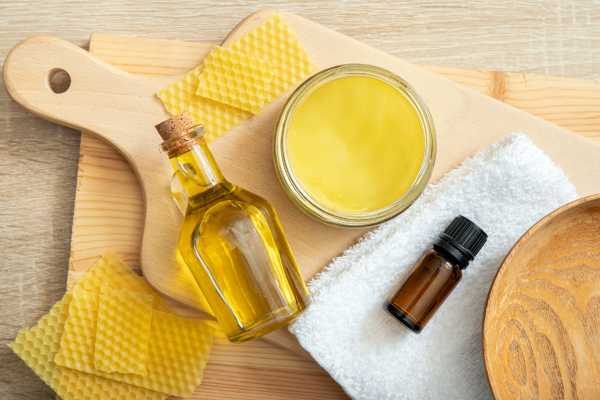
Polishing your cutting board with beeswax is an optional but highly effective step for extra protection and a glossy finish. Beeswax adds a natural water-resistant barrier, keeping the board safe from moisture and prolonging its lifespan. To apply, gently melt a small amount of beeswax in a double boiler, ensuring it doesn’t overheat. Once liquefied, use a soft cloth or brush to apply an even layer of beeswax across the surface. Allow the wax to penetrate the wood for several hours, then buff the board with a clean cloth to achieve a smooth, shiny finish. This step enhances both the appearance and durability of your cutting board.
Drying and Curing Time
Polishing your cutting board with beeswax is an excellent optional step to add extra protection and a glossy finish. Beeswax creates a waterproof barrier that seals in moisture and extends the life of the board. To apply, melt a small amount of beeswax in a double boiler or microwave until it becomes soft and easy to spread. Using a clean cloth, apply the melted beeswax evenly across the surface of the cutting board, rubbing it in circular motions. Let the wax sit for several hours or overnight, then buff the board with a soft cloth to achieve a smooth, shiny finish that enhances both appearance and durability.
Maintaining a Finished Cutting Board
Maintaining a finished cutting board is crucial for its longevity and performance. Regular oiling with food-safe mineral oil helps to keep the board hydrated, preventing cracks and warping. Apply oil every few weeks or whenever the board looks dry, ensuring even coverage. Cleaning the board with mild soap and warm water after each use is essential, but avoid soaking or placing it in the dishwasher, as excessive moisture can damage the wood. Proper care not only preserves the finish but also extends the cutting board’s life, keeping it functional and beautiful for years while ensuring it remains resistant to bacteria and wear.
Common Mistakes to Avoid
Common mistakes can compromise its safety and longevity. A common error is using non-food-safe oils like vegetable or olive oil, which can spoil and damage the board. Always opt for food-grade oils such as mineral oil or beeswax. Over-sanding the surface is another issue, as it can seal the wood grain and hinder oil absorption. Stick to a gradual sanding process, finishing with fine grit for the best results. Additionally, neglecting to clean the board beforehand can lead to trapped dirt and debris in the finish. Make sure your board is clean and dry before applying any oil for a smooth, durable finish.
Final Thoughts
Finishing a cutting board properly is crucial for maintaining its durability, safety, and aesthetic appeal. By following the right steps, from sanding to applying food-safe oils like mineral oil or beeswax, you can extend the life of your board while enhancing its functionality. Avoiding common mistakes, such as using non-food-safe oils or skipping the cleaning process, ensures your cutting board remains in top condition. Learning *how to finish cutting board* effectively not only protects the wood but also enhances your kitchen experience. With the right care and maintenance, your cutting board will serve you for years to come, staying both beautiful and practical.