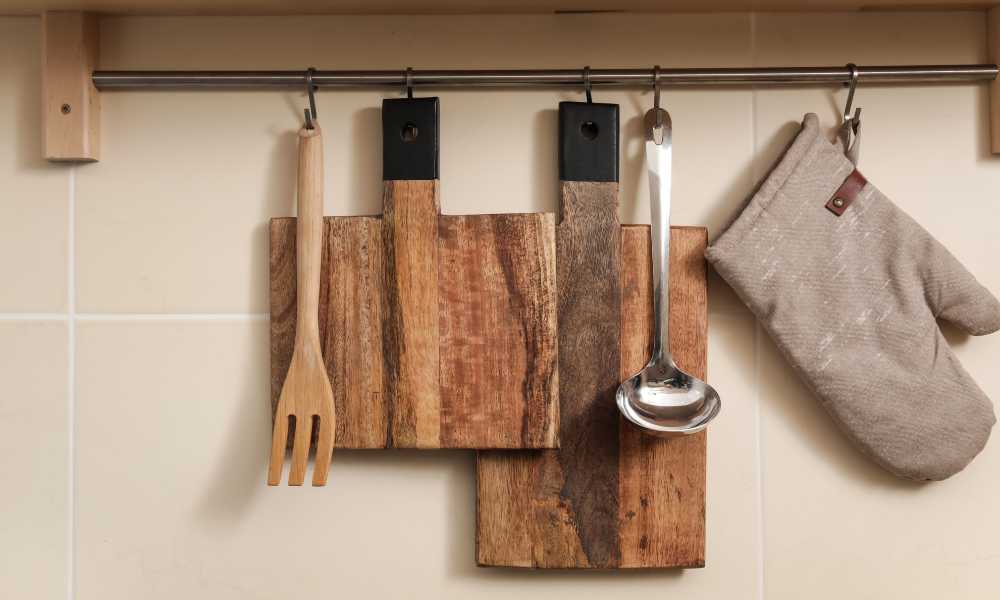
Welcome to our guide on “How to Hang Cutting Board on Wall,” a creative solution that combines functionality with aesthetic appeal in your kitchen. Whether you’re aiming to save space, display your collection of artisanal boards, or just keep your favorite chopping tools within arm’s reach, hanging your cutting boards can transform your kitchen walls into a focal point of interest and efficiency. This article will walk you through the entire process, from selecting the right tools and materials to the final touches that ensure your boards are both beautifully displayed and securely fastened. Let’s elevate your kitchen’s style and practicality with this simple yet transformative project.
Choosing the Right Cutting Board

Selecting the perfect cutting board for wall display requires careful consideration of several key factors. Size is crucial; the board should be large enough to be functional yet not overpower the space it occupies. Weight also plays a significant role; opt for boards that are light enough to hang securely without straining wall fixtures. Material choices vary widely, from rich woods that add a warm touch to modern acrylics that suit a sleek kitchen aesthetic. Each material offers different benefits and visual appeal, so consider the overall style of your kitchen when making your selection. Choosing the right combination ensures your cutting boards are both decorative and practical additions to your home.
Tools and Materials Needed
For your project on “How to Hang Cutting Board on Wall,” ensure you have the right tools and materials at hand for a smooth installation. You’ll need sturdy hooks or hangers designed to support the weight of your cutting boards, nails or screws appropriate for your wall type, and a level to guarantee that your boards hang straight. Additionally, having a pencil for marking positions, a measuring tape for spacing, and possibly a stud finder if you plan to anchor in drywall can make the process more precise. Gather these items beforehand to streamline your setup and achieve a professional-looking display on your kitchen wall.
Preparation Steps

Before you begin hanging your cutting boards, proper preparation is key to ensure a smooth installation. Start by selecting an appropriate wall space that is easily accessible and has enough area to display your boards attractively. Clean the wall thoroughly to remove any dust or grease that could hinder the adherence of mounting hardware. Next, gather all necessary tools such as a tape measure, level, pencil, drill, and the appropriate hooks or hangers for your cutting boards. Having everything on hand before you start will streamline the process and help achieve a clean, professional finish on your kitchen wall.
Marking the Wall
Preparing to hang your cutting boards, precise marking on the wall is crucial for both aesthetics and practicality. Start by deciding on the arrangement and spacing, ensuring each board will be easily accessible and visibly appealing. Use a pencil and a level to make light marks where the hooks or hangers will go, checking that these marks are evenly spaced and aligned. This step helps prevent unnecessary holes and ensures that your cutting boards hang straight and look uniformly organized. Accurate marking leads to a cleaner installation, enhancing your kitchen’s overall look while keeping your boards within easy reach.
Choosing Hooks and Hangers

Selecting the right hooks and hangers is crucial when you decide to hang a cutting board on your wall. The durability and compatibility with your wall material should guide your choice to ensure your cutting boards hang securely. For lightweight boards, adhesive hooks can be a quick and damage-free option, while heavier wooden boards might require more robust solutions like anchored hooks or metal hangers. Consider the aesthetics of the hooks to complement your kitchen’s décor, ensuring they blend seamlessly with both the boards and the overall style of your space. Make sure the hooks can support the weight and size of your cutting boards to prevent any accidents.
Installation Process
Begin the installation process by selecting the appropriate hooks or hangers that can support the weight of your cutting boards. First, mark the points on the wall where the hooks will be placed, using a level to ensure they are even. Drill pilot holes at these marks, considering the wall type—drywall may require anchors for added stability. Attach the hooks securely into these holes, tightening them enough to ensure they can bear the load without damaging the wall. Once all hooks are installed, test their stability before hanging your cutting Slab to ensure a safe and effective display in your kitchen.
Securing the Cutting Boards

Attaching cutting boards to your kitchen wall securely involves careful preparation and the right hardware. First, align the board’s position on the hook or hanger marked on your wall. If you’re using hooks, ensure they are screwed tightly into the wall, strong enough to support the board’s weight. For hangers, fasten them at the back of the board at equal distances to maintain balance. Once positioned, gently hang the cutting board on the hook or hanger to check stability. Press down slightly to test the hold. This method ensures that your cutting boards are not only an aesthetic enhancement but also safely and securely displayed.
Decorative Tips
Elevate your kitchen’s decor by artistically arranging cutting Slab on your wall. To achieve a visually pleasing display, consider varying the shapes, colors, and types of wood of your boards. Mix rectangular, round, and uniquely shaped boards to create an engaging pattern. Utilize the natural hues of bamboo, walnut, and maple to introduce warmth and texture. For a cohesive look, align the Slab in symmetrical patterns or opt for an eclectic, staggered arrangement to capture a more dynamic feel. This simple adjustment not only enhances your kitchen’s aesthetics but also makes your barbed Slab an integral part of your home’s design.
Safety Considerations

Learning how to hang cutting board on wall, safety must be a top priority. Avoid using weak or inadequate hooks that cannot support the board’s weight. Don’t mount cutting boards on uneven or unstable surfaces that may compromise their stability. Be sure to use wall anchors if hanging on drywall to prevent falling. Don’t place cutting boards in high-traffic areas where they could be knocked off easily. Always ensure the hooks are securely fastened and check periodically for any loosening over time. Following these safety tips will help keep your barbed Slab securely in place, preventing accidents and ensuring long-lasting wall decor.
Maintenance and Care
Proper maintenance and care are essential once you’ve mastered “How to Hang Cutting Board on Wall.” Regularly clean the cutting boards to preserve their appearance and prevent buildup. For wooden Slab, use a mild soap and water, followed by a conditioning oil to keep them from drying out. Ensure your boards are fully dry before hanging them back up. Additionally, check the wall fittings periodically to confirm they remain secure and stable, as loose fittings could lead to accidents. This simple routine will keep your display both safe and visually appealing, allowing your barbed Slab to enhance your kitchen space for years to come.
Conclusion
We hope this guide on “How to Hang Cutting Board on Wall” has sparked inspiration for enhancing your kitchen’s functionality and style. By following these simple steps, you can transform your cutting boards into a visually appealing display that also frees up valuable counter space. From choosing the right hooks to regularly checking the fittings, this DIY project allows you to personalize your kitchen decor while keeping your cooking essentials within easy reach. So, grab your favorite Slab, select a suitable wall, and enjoy the blend of practicality and aesthetics that this project brings to your kitchen. Embrace the change and create a stylish, organized cooking space today!

