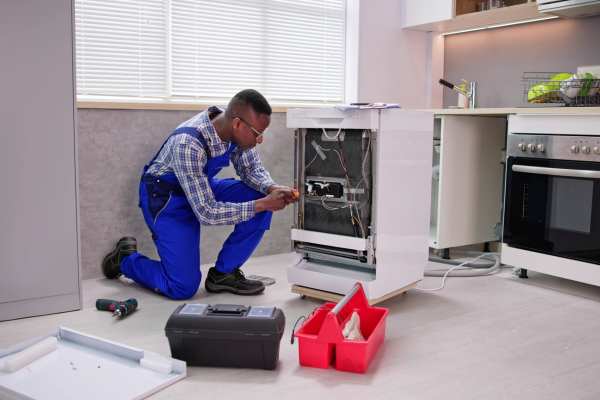
Installing a dishwasher might seem daunting, but with the right guidance, it’s a task you can handle efficiently. Whether you’re upgrading your kitchen or replacing an old unit, knowing how to install a dishwasher ensures it operates smoothly and saves you money on professional services. This step-by-step guide will walk you through everything from selecting the right tools to connecting water, drain, and electrical lines. With proper preparation and a few precautions, you’ll have your dishwasher running in no time. Say goodbye to manual dishwashing and hello to convenience! Let’s dive into the details so you can enjoy hassle-free installation and long-lasting performance.
Tools and Materials Needed

Before beginning the process of how to install a dishwasher, it’s crucial to gather all the tools and materials you’ll need. Essential tools include a wrench, screwdriver, and drill, which are indispensable for assembling and securing components. For materials, make sure you have hose clamps, Teflon tape, and a reliable water supply line to ensure leak-free connections. Organizing these items beforehand saves time and avoids interruptions during installation. Double-check that your tools are functional and materials are compatible with your dishwasher model. Proper preparation is the key to a smooth and efficient installation process, setting you up for long-term success and optimal dishwasher performance.
Safety Precautions
Learning how to install a dishwasher, prioritizing safety is essential to avoid accidents or damage. Start by turning off the electricity and water supply to prevent shocks and leaks during the process. Always use appropriate protective gear, such as gloves and safety goggles, to shield yourself from sharp edges or unexpected spills. Be cautious around electrical and plumbing components, as mishandling these can lead to costly repairs or injuries. Clear the workspace of obstacles to ensure a smooth installation. Following these precautions not only protects you but also ensures the dishwasher is installed securely and functions optimally. Safety should always come first in any home improvement project!
Choosing the Right Location
Installing a dishwasher, selecting the right location is crucial for optimal performance. Choose a spot close to the sink to simplify water and drain line connections. Ensure there’s enough cabinet space to accommodate the unit without obstructing nearby appliances. Proper ventilation is vital to prevent overheating, so leave adequate clearance around the dishwasher. Check for easy access to water lines and electrical outlets, ensuring they meet safety standards. Accurate measurements are key—use a measuring tape to confirm the space matches your dishwasher’s dimensions, including height, width, and depth. A well-chosen location ensures your dishwasher operates efficiently and fits seamlessly into your kitchen layout.
Removing the Old Dishwasher (If Applicable)

Removing the old dishwasher, safety should be your top priority. Start by turning off the power supply at the circuit breaker and shutting off the water valve to prevent accidents. Carefully disconnect the water supply line and drain hose, placing a towel beneath to catch any leaks. Next, detach the electrical connections, ensuring wires are safely capped and labeled for later reference. Loosen the mounting brackets securing the dishwasher and gently slide it out of its space. Inspect the area for debris or damage, and clean it thoroughly to prepare for the new unit. Proper preparation ensures a seamless installation and avoids unnecessary complications.
Preparing the New Dishwasher

Preparing your new dishwasher for installation, start by carefully removing all packaging and inspecting the unit for any visible damages. This step ensures you address potential issues before proceeding. Next, focus on pre-installation setup, which includes attaching mounting brackets and securely connecting the drain hose. Proper setup prevents leaks and ensures the dishwasher stays in place. Don’t forget to adjust the dishwasher feet to achieve perfect leveling, as this is crucial for smooth operation and to avoid water pooling. Taking the time to prepare your dishwasher thoroughly guarantees a hassle-free installation process and optimal performance for years to come.
Connecting the Water Supply Line
Connecting the water supply line during your dishwasher installation, start by identifying the inlet valve on the appliance. Attach the water supply line firmly, ensuring it aligns perfectly to avoid leaks. Apply Teflon tape around the threads of the inlet valve to create a watertight seal, which is crucial for preventing drips or damage. Tighten the connection securely using a wrench, but be cautious not to overtighten, as this could damage the fittings. A snug and secure connection will ensure a smooth flow of water and optimal Dish cleaning machine performance. Taking these steps carefully will help you avoid future leaks and ensure long-term reliability.
Setting Up the Drain Hose
Setting up the drain hose during a dishwasher installation, proper placement is crucial to ensure smooth operation and prevent issues. Start by routing the hose correctly to avoid potential clogs or leaks—keep it elevated in a high loop to maintain proper drainage. Connect the hose securely to the garbage disposal or sink drain, ensuring all clamps are tightened to prevent water leakage. Double-check that the hose is firmly secured and won’t become dislodged during use. A loose or improperly routed hose can lead to water damage or malfunction, so take the time to do it right. This step ensures reliable performance and peace of mind.
Electrical Connections
install a dishwasher , proper handling of electrical connections is crucial for safety and functionality. Start by ensuring the power supply is turned off at the circuit breaker. Dishwashers typically come in two types: plug-in models and hardwired systems. For plug-in models, use a grounded outlet, ensuring the cord is secure and undamaged. Hardwired units require connecting the wires carefully, matching colors (black, white, and green for ground) and using wire nuts for a secure fit. Always test the connections after installation by powering on and running a short cycle. Proper wiring ensures your Dish cleaning machine operates efficiently while minimizing the risk of electrical hazards.
Positioning and Securing the Dishwasher

Positioning and securing your dishwasher is a crucial step in the installation process. Carefully slide the unit into place, ensuring no damage to water supply lines or electrical connections. Proper alignment is essential to avoid potential leaks or performance issues. Use a level to check that the Dish cleaning machine is evenly positioned, as an uneven setup can impact its efficiency and lifespan. Once in place, secure the unit firmly to prevent unnecessary movement during use, which could lead to wear and tear over time. Following these steps ensures your Dish cleaning machine remains stable and operates at peak performance, giving you long-term convenience and reliability.
Testing the Dishwasher

Before declaring the installation complete, running a test cycle is crucial to ensure everything is working as intended. Start by checking for leaks in the water connections and ensuring the drain hose is properly secured. Listen for any unusual noises that might indicate loose components or improper alignment. If you notice issues like improper drainage or incomplete cleaning, make adjustments such as tightening connections or releveling the unit. Common problems like leaks or error codes often have simple fixes, so refer to the manual for guidance. Proper testing not only guarantees your Dish cleaning machine functionality but also prevents future issues, ensuring long-term efficiency and satisfaction.
Final Thoughts
Installing a dishwasher is simpler than it seems when you follow a clear and structured guide. By carefully preparing, connecting water and electrical lines, and testing the unit for functionality, you can ensure a hassle-free setup that works perfectly for years to come. Knowing how to install a dishwasher not only saves you money on professional services but also gives you the satisfaction of completing a DIY project. Remember to check for leaks, unusual noises, and proper alignment during the test run to avoid future issues. With these steps, your kitchen will soon enjoy the convenience of a reliable, well-installed Dish cleaning machine.Get started and enjoy the upgrade!

