
Installing a Moen Adler kitchen faucet can elevate both the functionality and aesthetic appeal of your kitchen. This guide on how to install the Moen Adler kitchen faucet will walk you through each step with ease, ensuring that you can enjoy the benefits of a sleek, modern fixture in no time. The Moen Adler faucet is designed for durability and ease of use, making it an excellent choice for homeowners looking to upgrade their kitchen. With its straightforward installation process, even those with minimal plumbing experience can achieve professional results. By following our detailed instructions, you’ll be able to confidently install your Moen Adler kitchen faucet and enhance your kitchen’s overall performance and style.
What Should I Do If I Find A Leak After Installation?

Once you have fixed the source of the leak, make sure to thoroughly dry the area and check for any signs of water damage or mold growth. If necessary, use a sealant or waterproofing material to ensure that the area is properly sealed and protected from future leaks. It’s also a good idea to monitor the area for a few days after fixing the leak to ensure that it has been fully resolved.
How Do I Clean My Moen Adler Faucet?

Cleaning your Moen Adler faucet is a relatively simple process that can help maintain its appearance and functionality. Start by turning off the water supply to the faucet to prevent any accidents or leaks during cleaning. Use a mild soap or detergent mixed with warm water to clean the exterior of the faucet, including the handle and spout. Avoid using harsh chemicals or abrasive cleaners, as they can damage the finish of the faucet.
Checking The Package Contents
Before beginning the installation of your Moen Adler kitchen faucet, it’s crucial to ensure that you have all the necessary components. Start by carefully unpacking the faucet and inspecting the contents against the manufacturer’s list. Typically, you should find the faucet spout, handles, water supply hoses, mounting hardware, and installation instructions. This thorough check will prevent any delays or interruptions during the installation process, allowing you to proceed smoothly and efficiently.
Understanding The Parts
Understanding the parts is the next important step in installing your Moen Adler kitchen faucet. Familiarize yourself with components such as the base, handles, spout, and any additional features like sprayers or soap dispensers. Each part plays a key role in the functionality and appearance of your faucet, so understanding their assembly and function will streamline the installation process.
Positioning The Gasket
Positioning the gasket correctly is essential to prevent leaks and ensure a secure fit. Place the gasket over the faucet holes in your sink, aligning it properly to create a tight seal. This step not only enhances the performance of your Moen Adler kitchen faucet but also prevents water damage and maintains the integrity of your kitchen sink area. Take care to position the gasket evenly and snugly before proceeding with the rest of the installation.
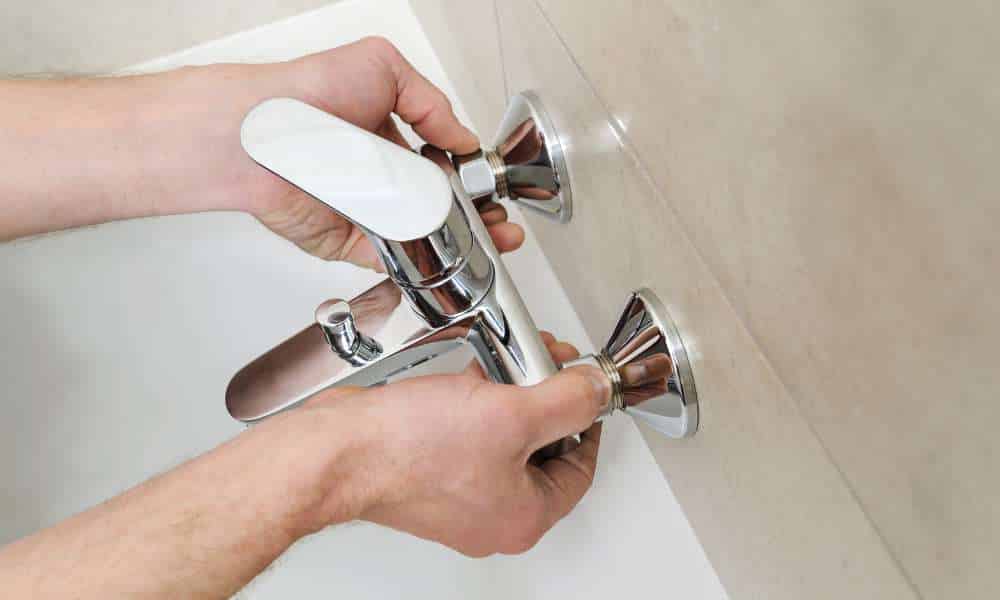
Securing The Faucet Base
Securing the faucet base is the next crucial step in installing your Moen Adler kitchen faucet. Start by positioning the faucet base correctly on the sink or countertop where you want to install it. Use the mounting hardware provided to secure the base tightly in place. Ensuring a snug fit prevents any movement or wobbling of the faucet during use, enhancing both its stability and functionality in your kitchen.
Attaching The Handle
Attaching the handle comes next in the installation process of the Moen Adler kitchen faucet. Depending on the model, this step may involve connecting the handle directly to the faucet body or attaching it separately. Follow the manufacturer’s instructions carefully to ensure proper alignment and secure attachment of the handle. This ensures smooth operation and easy control of water flow and temperature once the installation is complete.
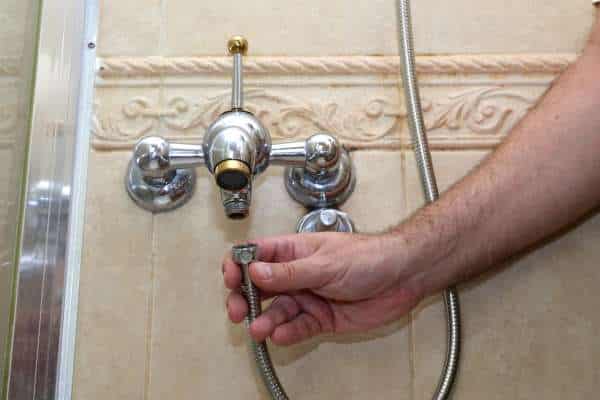
Connecting The Sprayer Hose
Connecting the sprayer hose is a crucial step in ensuring your kitchen faucet functions effectively. To remove a kitchen faucet without a basin wrench, you can try using an adjustable wrench or pliers to loosen the nuts and bolts holding it in place. Once you have successfully detached the old faucet, carefully thread the new one into position before connecting the sprayer hose.
Tightening The Mounting Nuts
One crucial aspect is tightening the mounting nuts securely. Begin by placing the faucet through the mounting holes in the sink, ensuring a snug fit. Using an adjustable wrench, carefully tighten the mounting nuts underneath the sink. This not only stabilizes the faucet but also prevents any potential leaks, ensuring a reliable installation process.
Installing The Sprayer Hose
Installing the sprayer hose is essential for the faucet’s full functionality. Attach one end of the sprayer hose to the faucet’s underside, ensuring a firm connection. Thread the other end through the faucet’s center hole and secure it to the sprayer hose nipple. This step guarantees that the sprayer functions smoothly and efficiently, enhancing the faucet’s usability in the kitchen.
Calibrating Water Pressure
Calibrating water pressure is another crucial step in installing the Moen Adler kitchen faucet. Adjusting the water pressure ensures optimal performance and prevents unnecessary strain on the faucet components. Begin by turning on both the hot and cold water supply valves gradually. Test the faucet to ensure a steady flow without any irregularities or excessive pressure. This calibration process not only extends the faucet’s lifespan but also enhances water efficiency in your kitchen.
The Final Thought
To install a Moen Adler kitchen faucet is a straightforward process that can be completed by most homeowners with basic plumbing skills. By following the steps outlined in this guide and using the provided tools, you can successfully upgrade your kitchen with a new faucet in no time. Remember to carefully read the manufacturer’s instructions and take necessary safety precautions throughout the installation process. With a little patience and attention to detail, you can enjoy the benefits of a functioning and stylish Moen Adler kitchen faucet in your home. Take the first step towards upgrading your kitchen today by installing a Moen Adler faucet and enhancing both the functionality and aesthetics of your space.