
Replacing the cartridge in your kitchen faucet is a straightforward task that can restore functionality and extend the lifespan of your fixture. Knowing how to replace the cartridge in a kitchen faucet is crucial for maintaining optimal water flow and preventing leaks. By learning this skill, you can save money on plumbing costs and avoid potential water damage in your home. This guide will walk you through the steps involved in replacing the cartridge in a kitchen faucet, ensuring you can confidently tackle this essential maintenance task yourself.
How Often Should I Replace The Cartridge In My Kitchen Faucet?
The frequency at which you should replace the cartridge in your kitchen faucet depends on several factors such as water quality, usage, and manufacturer recommendations. In general, it is recommended to replace the cartridge every 1-2 years to ensure optimal performance and prevent any potential leaks or malfunctions. If you notice a decrease in water pressure, leaking, or difficulty in turning the handle, it may be time to replace the cartridge sooner.
Can I Use Any Brand Of Replacement Cartridge?

Choosing the right brand of replacement cartridge can also impact the overall efficiency and fuel consumption of your car. Some brands may offer better filtration and protection for your engine, leading to improved performance and longevity. Investing in a reputable brand that is recommended for your car model can help ensure that you are getting the best possible replacement cartridge that will keep your vehicle running smoothly.
Understanding Kitchen Faucet Cartridge

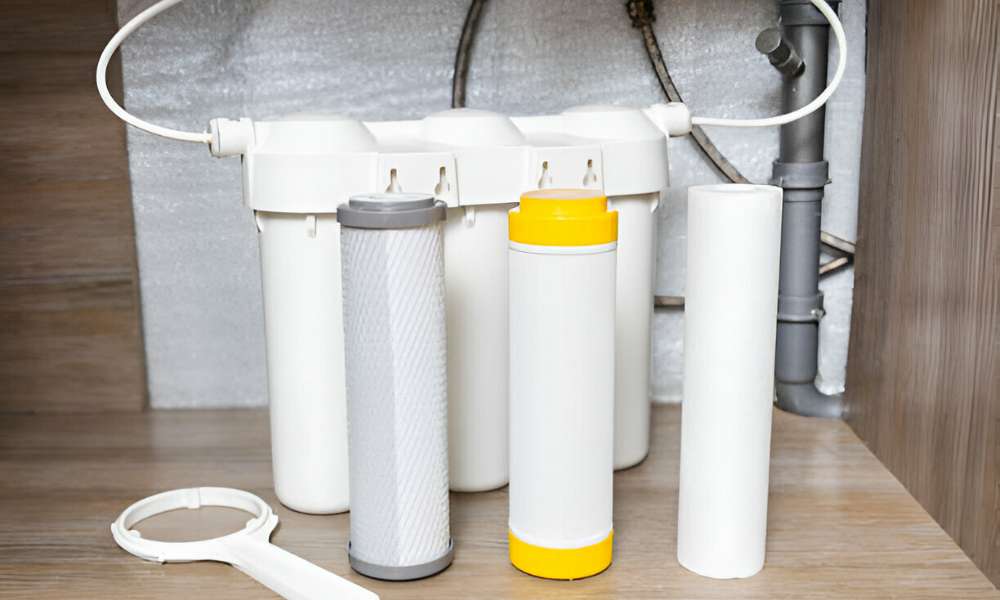
Understanding the kitchen faucet cartridge is crucial before attempting to replace it. The cartridge serves as the control valve that regulates water flow and temperature within the faucet. Over time, cartridges can wear out, leading to issues like leaks or difficulty in adjusting water temperature. By familiarizing yourself with the type of cartridge your faucet uses—whether it’s a ceramic disc, ball, or compression—you can ensure you purchase the correct replacement and proceed with confidence.
Accessing The Cartridge
Accessing the cartridge typically involves removing the faucet handle first. Start by locating the set screw that holds the handle in place; this is usually found under a decorative cap or cover. Use an appropriate tool, such as an Allen wrench or screwdriver, to loosen and remove the set screw. Once the set screw is removed, carefully lift off the handle to expose the cartridge underneath. Some faucets may have additional components or covers that need to be removed to access the cartridge fully. Take note of the orientation and configuration of these parts as you disassemble them.
Remove The Handle
To remove the handle of your sink faucet, start by turning off the water supply valves beneath the sink. Use an adjustable wrench to disconnect the supply lines from both hot and cold valves. Next, locate the retaining nut that secures the faucet handle to the base and unscrew it using an appropriate tool. Once you’ve removed the nut, gently lift off the handle from its position.
Replace The Cartridge
Replace the cartridge with a new one suited for your faucet model. Cartridges vary depending on the brand and design of your faucet, so ensure you have the correct replacement before proceeding. Insert the new cartridge into the faucet body, aligning it properly according to the manufacturer’s instructions. This part of the process ensures smooth operation and longevity of your kitchen faucet, reducing the likelihood of leaks and maintaining consistent water flow.
Reassemble The Faucet
After replacing the cartridge, reassemble the faucet by reversing the steps you took to remove the handle. Carefully place the handle back onto the faucet body, ensuring it fits snugly into place. Use the set screw to secure the handle firmly, ensuring it is stable and operates smoothly. Reassembling the faucet properly is essential for functionality and aesthetic appeal, restoring your kitchen’s usability and maintaining its overall appearance.
Dealing With Stuck Cartridges
Dealing with stuck cartridges in kitchen faucets can be a frustrating experience, but with the right approach, it doesn’t have to be a major headache. When facing this issue, one of the key techniques to keep in mind is using lubricants such as WD-40 or vinegar to help loosen the cartridge. These substances can penetrate the stuck parts and make it easier to wiggle them free.
Regular Cleaning And Lubrication
Regular cleaning and lubrication of the cartridge can prevent future issues and prolong its lifespan. After removing the old cartridge, inspect it for any debris or mineral buildup. Clean the inside of the cartridge housing with a soft brush and mild soap to ensure a smooth fit for the new cartridge. Applying silicone-based plumber’s grease to the O-rings and moving parts of the new cartridge will facilitate smooth operation and prevent leaks.
Extracting The Old Cartridge
Extracting the old cartridge from your kitchen faucet requires careful attention to detail and a systematic approach. Start by locating the set screw or retaining clip that secures the cartridge in place and remove it using the appropriate tools. Depending on the faucet model, you may need to use a cartridge puller tool to safely extract the cartridge from its housing. Once the cartridge is free, inspect it for any signs of damage or wear that may necessitate replacement. Cleaning the inside of the cartridge housing thoroughly before installing a new cartridge is crucial to ensure a proper fit and seal. Following these steps ensures that you can successfully remove the old cartridge from your kitchen faucet and prepare it for replacement.
The Final Thought
Replacing a cartridge in a kitchen faucet is a simple and cost-effective solution to fixing leaks and improving water flow. By following the step-by-step guide outlined in this article, you can easily tackle this DIY project without the need for professional help. Remember to turn off the water supply before starting and take your time to carefully remove and install the new cartridge. With the right tools and a bit of patience, you can have your kitchen faucet working like new in no time.