
Upgrade your kitchen effortlessly with our comprehensive guide on how to replace kitchen faucet. A new faucet not only revitalizes the aesthetic appeal of your kitchen but also enhances functionality and efficiency. Whether you’re a seasoned DIY enthusiast or a novice, replacing your kitchen faucet is a manageable task with the right tools and knowledge. In this article, we’ll walk you through the step-by-step process, highlighting the importance of proper installation and the benefits of upgrading your faucet. With our detailed instructions, you’ll discover why replacing your kitchen faucet is a rewarding project that you can confidently tackle.
How Long Does It Typically Take To Replace A Kitchen Faucet?
Replacing a kitchen faucet typically takes around 1-2 hours for someone with basic plumbing skills. The process involves turning off the water supply, disconnecting the old faucet, installing the new one, and making sure everything is properly sealed and connected. However, the time can vary depending on the complexity of the faucet design and any unforeseen issues that may arise during installation.
Do I Need Any Special Skills Or Knowledge To Replace A Faucet?
Having the right tools such as an adjustable wrench, pliers, and plumber’s tape can make the job easier. Following manufacturer’s instructions and taking your time during the installation process can help prevent any issues or leaks. If you are unsure about any step or encounter difficulties, it may be best to consult a professional plumber to ensure the job is done correctly.
Disconnecting Water Supply Lines
Disconnecting water supply lines is a crucial step when installing or replacing a kitchen faucet. Before beginning the process, it’s important to turn off the main water supply using the shut-off valves located under the sink. Using an adjustable wrench, carefully loosen and remove the nuts connecting the supply lines to the faucet.
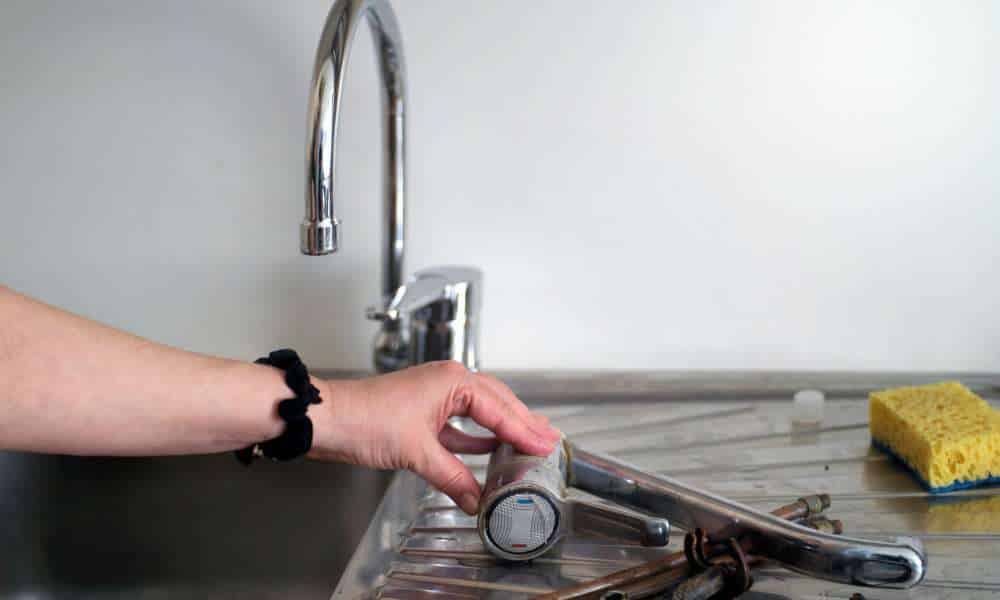
Loosening And Removing Mounting Nuts
Loosen and remove the mounting nuts that secure the old faucet to the sink. Depending on the type of faucet you have, these nuts may be located either on the top or underside of the sink. Use a basin wrench or adjustable pliers to loosen the nuts, turning them counterclockwise until they are fully detached. Take care not to damage the sink or surrounding fixtures while removing the nuts, as this can complicate the installation of the new faucet.
Detaching The Old Faucet From The Sink

After removing the mounting nuts, it’s time to detach the old faucet from the sink. Lift the faucet assembly carefully, ensuring all connections are fully disconnected. You may need to wiggle the faucet slightly to loosen it from any remaining sealant or adhesive. Once the old faucet is detached, clean the area thoroughly to prepare for the installation of the new faucet. Remove any debris or residue from the sink surface to ensure a proper seal with the new faucet.
Shutting Off Water Supply Valves
Shutting off the water supply valves is essential for a smooth faucet replacement process. These valves, usually located under the sink, control the flow of water to the faucet. Turning them off prevents any water from gushing out while you work on removing the old faucet and installing the new one. Remember to turn both the hot and cold water valves clockwise until they are fully closed. This precautionary measure minimizes the risk of water damage and ensures a safer working environment.
Taking Safety Precautions
Taking safety precautions is paramount when replacing a kitchen faucet to avoid injuries and mishaps. Before starting the replacement process, ensure that you have the necessary safety equipment, such as gloves and safety goggles, to protect your hands and eyes from potential hazards. Additionally, keep a bucket or towels handy to catch any water that may drip from the disconnected supply lines. Taking these precautions not only ensures your safety but also contributes to a smoother and more efficient faucet replacement experience.
Connecting Water Supply Lines
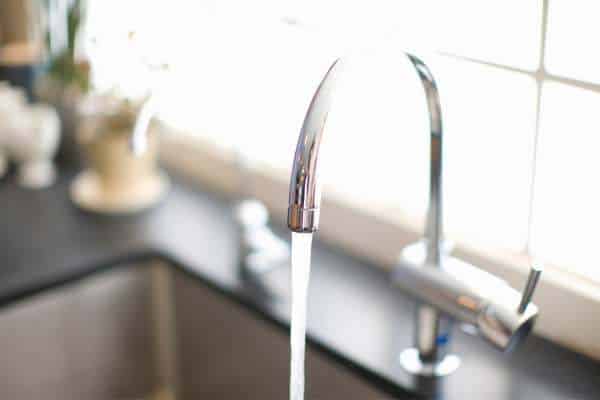
Connecting water supply lines is the next essential task in replacing your kitchen faucet. Begin by attaching the new faucet to the sink deck, following the manufacturer’s instructions. Then, connect the hot and cold water supply lines to the corresponding valves, ensuring they are securely tightened with wrenches. Double-check for any leaks before moving on to the next step, ensuring a hassle-free installation process and uninterrupted water flow.
Positioning The New Faucet Correctly
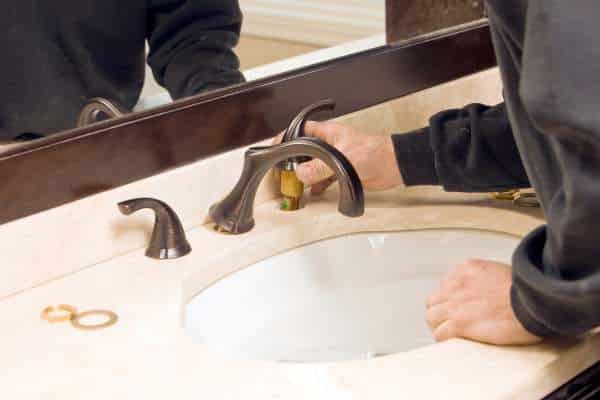
Positioning the new faucet correctly is key to a successful replacement. Before securing the faucet in place, ensure it is aligned properly with the sink and backsplash. Adjust the position as needed to ensure optimal functionality and aesthetic appeal. Once satisfied with the placement, use the provided hardware to secure the faucet to the sink deck or countertop. Take care not to overtighten the screws, as this could damage the fixture or the surface it’s mounted on. With the faucet securely positioned, you can proceed to reattach any additional components, such as the sprayer or soap dispenser, if applicable.
Making Aesthetic Adjustments
Making aesthetic adjustments to your home can completely transform the look and feel of a room. One simple change that can have a big impact is replacing your kitchen faucet. By selecting a modern, sleek design, you can instantly elevate the style of your kitchen and create a more polished appearance. Consider opting for a brushed nickel finish for a contemporary touch, or go for a matte black faucet for a bold statement
Addressing Minor Repairs Promptly
Addressing minor repairs promptly during the replacement process can prevent potential issues in the future. Inspect the sink and surrounding area for any signs of wear, damage, or leaks. Replace worn-out washers, gaskets, or O-rings to prevent leaks and ensure a tight seal. Additionally, check for any corrosion or rust on the faucet components and replace them as needed. By addressing minor repairs during the faucet replacement, you can prolong the lifespan of your kitchen fixtures and maintain optimal functionality. Prompt attention to minor repairs ensures that your new kitchen faucet operates smoothly and efficiently for years to come.
Balancing Quality And Affordability
Balancing quality and affordability is essential when replacing your kitchen faucet. While it’s tempting to opt for the cheapest option available, investing in a high-quality faucet can save you money in the long run. Our guide provides valuable insights into choosing a faucet that strikes the perfect balance between durability, functionality, and cost-effectiveness. By considering factors such as materials, construction, and warranty coverage, you can ensure that your new faucet not only looks great but also performs reliably for years to come. With our expert tips, you can make an informed decision that maximizes value without compromising on quality.
Ignoring Manufacturer Instructions
Ignoring manufacturer instructions when replacing your kitchen faucet can lead to costly mistakes and unnecessary complications. Our step-by-step guide emphasizes the importance of following manufacturer guidelines for installation, ensuring a smooth and trouble-free process. From preparing the workspace to assembling the necessary tools and materials, each step is carefully explained to help you avoid common pitfalls and achieve professional results. By taking the time to read and understand the instructions provided by the faucet manufacturer, you can minimize the risk of leaks, damage, and other issues that may arise during installation. With our comprehensive guide, you can approach the task with confidence, knowing that you have the knowledge and resources to successfully replace your kitchen faucet.
The Final Thought
To replace a kitchen faucet is a manageable DIY project that can greatly enhance the functionality and aesthetics of your kitchen. By following the steps outlined in this guide, you can successfully replace your old faucet with a new one in just a few hours. Remember to gather all necessary tools and supplies before starting the project, and take your time to ensure everything is installed correctly. With the right preparation and attention to detail, you can enjoy a brand-new kitchen faucet that adds value and style to your home. So don’t hesitate to tackle this project yourself and transform your kitchen with a fresh new look today!