

Replacing your kitchen faucet is a simple yet impactful way to enhance your kitchen’s functionality and aesthetics. Learning how to replace your kitchen faucet not only saves you the cost of hiring a plumber but also empowers you with a valuable DIY skill. This task is important because a new spigot can improve water efficiency, reduce leaks, and modernize your kitchen’s look. By following a few straightforward steps and using basic tools, you can successfully complete this project on your own. This guide will walk you through the process, ensuring you have the confidence and knowledge to replace your kitchen faucet efficiently and effectively.
What Type Of Faucet Should I Buy?

Consider the material of the faucet. Stainless steel and chrome faucets are popular choices due to their durability and resistance to corrosion. It’s also important to check the water flow rate of the spigot to ensure it meets your needs while being water-efficient. Ultimately, the best type of spigot for you will depend on your personal preferences, budget, and specific requirements for functionality and style.
How Often Should I Replace My Kitchen Faucet?

The frequency of replacing your kitchen faucet depends on several factors such as the quality of the faucet, how often it is used, and any signs of wear or damage. In general, a high-quality spigot can last anywhere from 10 to 20 years with proper maintenance. However, if you notice leaks, corrosion, or difficulty in turning the handles, it may be time to consider replacing your kitchen spigot sooner.
Removing The Old Faucet
1. Disconnecting The Water Lines
The first step in replacing your kitchen faucet is disconnecting the water lines. Begin by shutting off the water supply valves located under the sink. Turn the valves clockwise to close them. Next, use an adjustable wrench to loosen the nuts connecting the water lines to the spigot. Be prepared with a bucket or towel to catch any residual water that may spill when you disconnect the lines. Properly disconnecting the water lines is crucial to avoid any water damage or mess during the process.
2. Loosening The Mounting Nuts
Once the water lines are disconnected, the next step is loosening the mounting nuts that secure the spigot to the sink. These nuts are typically located beneath the sink and can be accessed with a basin wrench. Carefully loosen these nuts by turning them counterclockwise. If the nuts are corroded or stuck, applying a penetrating oil can help. Loosening the mounting nuts properly ensures that the spigot can be easily removed without damaging the sink or surrounding fixtures.
3. Lifting Out The Old Faucet
After the mounting nuts are loose, you can lift out the old faucet. Gently pull the faucet upwards, making sure to guide any attached hoses or sprayers through the mounting holes. If the faucet is stuck due to old caulking or sealant, use a putty knife to carefully break the seal around the base. Lifting out the old spigot completes the removal process, making way for the installation of a new one. Successfully removing the old spigot is a key step to replace your kitchen spigot, ensuring a smooth transition to the new fixture.
Clearing The Area Under The Sink
Before you begin the process to replace your kitchen faucet, it is essential to clear the area under the sink. This step ensures you have enough space to work and prevents any damage to items stored there. Start by removing cleaning supplies, trash bins, and other items that might obstruct your workspace. Place a towel or bucket underneath to catch any water that might spill when you disconnect the plumbing. Ensuring the area is clean and dry will make the installation process smoother and more efficient, allowing you to focus on securely installing your new spigot.
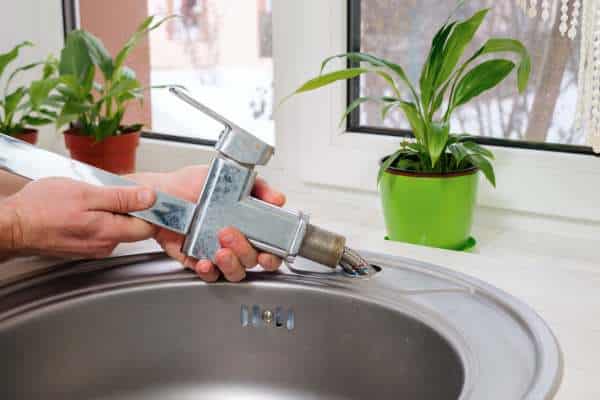
Securing The Faucet With Mounting Nuts
Once you have cleared the area and removed the old faucet, it’s time to secure the new faucet with mounting nuts. Position the new faucet in place, aligning it with the mounting holes on your sink. From underneath the sink, thread the mounting nuts onto the faucet’s shanks and tighten them to secure the spigot firmly. It’s crucial to ensure the spigot is stable and properly aligned to prevent leaks. Using a basin wrench can help you reach tight spaces and tighten the nuts effectively. By securing the spigot properly, you’ll ensure a long-lasting and reliable installation.
Soap Dispenser
Replacing your kitchen faucet is a great time to also install a new soap dispenser. An integrated design ensures easy access to soap while minimizing clutter on your countertop. Simply unscrew the old bottle and pump mechanism, then attach the new dispenser in its place. This simple upgrade will not only enhance the functionality of your sink area but also add an elegant touch to your kitchen space.
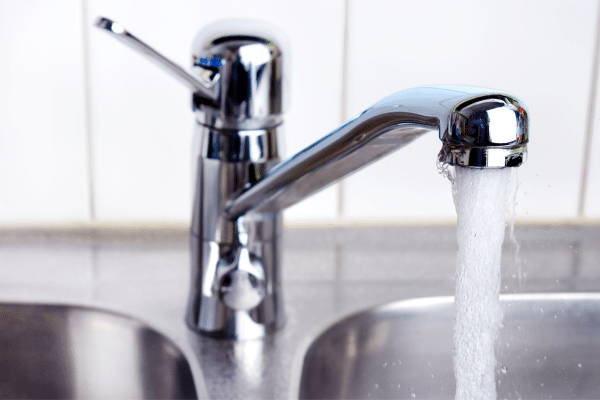
Testing For Proper Function
To further validate the installation of your new kitchen faucet, pay attention to any unusual noises or vibrations during operation. These may indicate improper installation or potential issues that need addressing. Finally, remember to test all functionalities of the spigot such as different spray modes and the pull-out handle if applicable. Taking these steps will not only ensure the proper functioning of your new kitchen spigot but also increase its longevity and performance in your daily tasks.
Adjusting Water Temperature
Adjusting the water temperature is an essential step after you replace your kitchen spigot. Most faucets have separate handles or a single lever to control hot and cold water. To adjust the temperature, locate the faucet’s mixing valve, typically found under the sink. Turn the valve to balance the hot and cold water flow according to your preference. Proper adjustment ensures that you get the desired water temperature quickly, enhancing your kitchen’s efficiency and comfort. This step is particularly important for maintaining safety, especially in households with children or elderly family members.
Loose Faucet Handle
A loose faucet handle can be a frustrating inconvenience in your daily kitchen routine. Not only is it an eyesore, but it can also lead to leaks and water wastage if left unattended. Fortunately, fixing a loose spigot handle is a relatively simple task that you can easily tackle on your own. By following some basic steps, you can restore the functionality and aesthetic appeal of your kitchen spigot in no time.
Preventing Mineral Buildup
Preventing mineral buildup in your kitchen spigot is essential for maintaining its functionality and prolonging its lifespan. One effective method to prevent buildup is by installing a water softener system, which helps to reduce the minerals present in the water that can cause deposits. Regularly cleaning your spigot using a mixture of vinegar and water can also help to dissolve existing mineral deposits and prevent new ones from forming. Additionally, using a spigot aerator can help regulate water flow and reduce splashing, which can contribute to mineral buildup over time.
The Final Thought
Replacing your kitchen faucet can be a straightforward and rewarding DIY project that can instantly upgrade the look and functionality of your kitchen. By following the step-by-step instructions outlined in this article, you can successfully install a new faucet with ease. Remember to gather all the necessary tools and materials before starting the process to ensure a smooth installation. Taking the time to properly replace your kitchen faucet can not only improve the aesthetics of your space but also enhance its overall efficiency.