

Embarking on a project to build a kitchen cabinet is not only a fulfilling journey into the world of DIY but also a practical approach to customizing your living space. This article aims to guide you through the essential steps of how to build a kitchen cabinet, ensuring you grasp the importance of meticulous planning, selecting the right materials, and understanding the construction process. Building a kitchen chiffonier by yourself offers numerous benefits, including the ability to tailor to specific dimensions and preferences, potentially saving costs compared to pre-made or custom-ordered alternatives.
What Tools Do I Need To Build A Kitchen Cabinet?
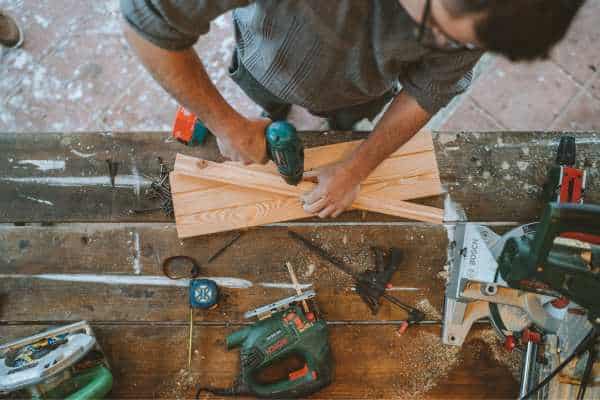
To build a kitchen cabinet, you will need a variety of tools to ensure a successful and efficient construction process. Some essential tools include a tape measure for accurate measurements, a circular saw or table saw for cutting the wood panels to size, a power drill with various drill bits for assembling the cabinet components, and a screwdriver for tightening screws.
How Long Does It Typically Take To Build A Kitchen Cabinet From Scratch?
The process typically involves measuring and cutting the wood, assembling the pieces, sanding and finishing the surfaces, and installing hardware such as hinges and handles. More intricate designs or custom features may require additional time for planning and execution. It is important to allow for sufficient time when undertaking a project like building kitchen cabinets from scratch to ensure quality craftsmanship and attention to detail.
Step-By-Step Guide To Building A Kitchen Cabinet

1. Building The Frame
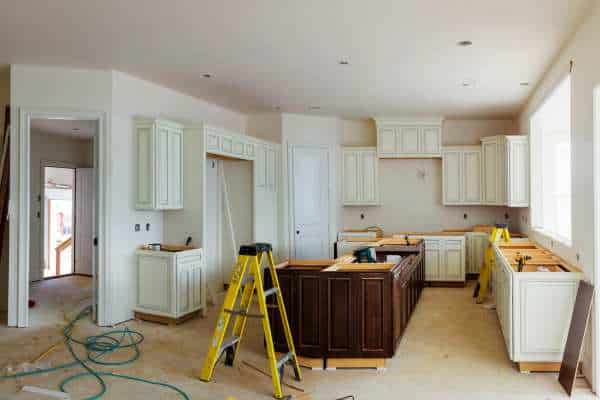
The foundation of any kitchen cabinet is its frame, the skeleton that supports everything else. Start by measuring the space where the cabinet will be installed to determine the size of your frame. Using high-quality plywood or solid wood will ensure durability and strength. Cut the pieces for the sides, bottom, and top of the cabinet. Join these pieces using wood glue and screws, ensuring the frame is square by measuring diagonally across the top. Reinforce the structure with corner brackets for added stability. This stage is crucial; a well-built frame is the cornerstone of a durable and functional chiffonier.
2. Adding Shelves And Doors
Once the frame is solid and square, the next steps are to add shelves and doors. For shelves, decide on the number and spacing based on your storage needs. Cut the shelves from the same material as the frame for consistency and fit them into the frame, securing them with screws or shelf pins for adjustable shelves. The doors can be made from plywood or solid wood, with the design depending on personal preference. Measure and cut the doors, ensuring they fit the frame’s opening with a slight gap around the edges for smooth operation. Sand all edges and surfaces to prepare for finishing.
3. Installing Hardware
The final step in building a kitchen cabinet is installing the hardware, which includes hinges, handles, or knobs. Select hinges that are appropriate for the type of doors you’ve created, such as concealed hinges for a modern look or traditional hinges for a classic feel. Attach the hinges to the doors, then to the frame, adjusting as necessary to ensure the doors open and close smoothly. Handles or knobs add the finishing touch to your cabinet, providing both functionality and style. Drill holes for the hardware, being careful to measure and align them accurately for a professional finish.
Sketching The Cabinet Design
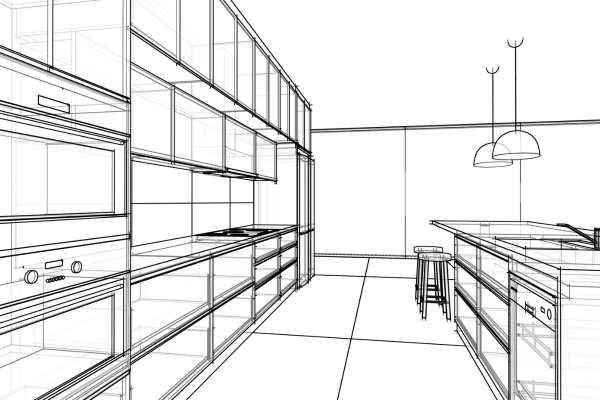
The initial step in building a kitchen cabinet is to sketch the design. This phase is crucial as it lays the groundwork for your project. Begin with a clear vision of what you want your cabinet to look like, considering the style, functionality, and how it will fit into your kitchen’s overall layout. Sketching allows you to visualize the end product, ensuring that your plans are in harmony with your kitchen’s aesthetics and space constraints. Remember, a well-thought-out design not only serves as a blueprint for your project but also helps in identifying the materials and tools needed, setting the stage for a successful build.
Calculating Cabinet Sizes Accordingly
Once your design is in place, the next step is to calculate the sizes of your cabinets accurately. This involves determining the height, width, and depth of your cabinets, taking into account the space available in your kitchen. It’s important to measure twice and cut once, as accuracy is key to ensuring that the cabinets fit perfectly in the designated area. Consider the standard dimensions for base and wall cabinets but tailor them to suit your specific requirements. This customization is one of the significant advantages of building your own kitchen chiffoniers, as it allows for flexibility and personalization.
Options For Cabinet Hardware
Selecting the right hardware is an essential aspect of building a kitchen cabinet, as it affects both the functionality and the aesthetic appeal of your cabinets. Hardware options include handles, knobs, drawer pulls, hinges, and drawer slides. The choice of hardware can significantly influence the look and feel of your kitchen, so consider the style and finish that best complements your cabinetry and kitchen decor. Additionally, pay attention to the quality of the hardware, opting for durable materials that can withstand the wear and tear of daily use.
Marking Wood For Cutting

Marking the wood for cutting is a critical step that requires precision and attention to detail. After calculating the sizes of your cabinets, use these measurements to mark the wood accurately. This step ensures that each piece of wood is cut to the exact dimensions needed for your cabinet, facilitating a smooth assembly process. Use a straightedge and a marking tool for precise lines, and double-check your measurements before making any cuts. Proper marking and cutting are foundational to building a cabinet that is structurally sound and visually appealing.
Using Appropriate Fasteners
Considering environmental factors such as moisture and temperature fluctuations is crucial when choosing fasteners for kitchen cabinets. Opting for corrosion-resistant materials like stainless steel or coated screws can help prevent rusting and deterioration in humid environments such as kitchens. By paying attention to these details and utilizing appropriate fasteners, you can ensure a sturdy and durable kitchen chiffonier that will withstand daily use for years to come.
Preparing Wood Pieces For Assembly
The foundation of a sturdy kitchen cabinet lies in how well the wood pieces are prepared before assembly. This involves measuring, cutting, and sanding the wood to achieve the perfect fit. Accurate measurements are paramount to ensure that all parts align correctly without gaps or overlaps. Once cut to size, sanding the edges and surfaces of each piece creates a smooth finish, eliminating any rough patches that could affect the cabinet’s final appearance or functionality. Preparing the wood pieces meticulously not only facilitates easier assembly but also contributes to the overall quality and aesthetics of the kitchen chiffonier, making it an essential step in the building process.
Mounting Cabinets Securely
Mounting cabinets securely is crucial for ensuring the durability and stability of your kitchen cabinetry. One often overlooked aspect is properly adjusting the kitchen cabinet doors to maintain a seamless and polished look. To achieve this, focus on adjusting the hinges to ensure that the doors align perfectly and close smoothly. Additionally, consider using adjustable feet or brackets to provide extra support and prevent any sagging over time.
Drilling Holes For Hardware Placement
An often overlooked but crucial part of building a kitchen cabinet is drilling precise holes for hardware placement, such as hinges, knobs, and drawer slides. This step requires careful planning and measurement to ensure that the hardware aligns correctly and operates smoothly. Using a drill press can enhance accuracy, especially for hinge cups and handle screws. Furthermore, pilot holes should be drilled before inserting screws to prevent wood from splitting. Proper hardware installation not only adds to the cabinet’s functionality but also its visual appeal, making it a critical aspect of the construction process.
Handling Minor Repairs
Even with meticulous planning and execution, minor repairs or adjustments may be necessary when building a kitchen chiffonier. This could involve filling in nail or screw holes, correcting misaligned doors, or touching up paint and finish. Using wood filler or putty can effectively conceal fastener heads, while sanding and additional coats of paint or stain can address any aesthetic issues. Addressing these minor repairs promptly ensures that they don’t turn into larger problems down the line, preserving the cabinet’s beauty and integrity. Moreover, this step underscores the importance of attention to detail and patience in the DIY process, ultimately contributing to a professional and polished final product.
The Final Thought
Building a kitchen cabinet is a rewarding project that requires careful planning and precise execution. By following the steps outlined in this guide, you can create a customized cabinet that fits your space perfectly. Remember to take accurate measurements, choose high-quality materials, and pay attention to detail throughout the construction process. With dedication and patience, you can achieve a beautiful and functional kitchen cabinet that will enhance the overall look of your kitchen. Start building your dream cabinet today and enjoy the satisfaction of completing a successful DIY project.