
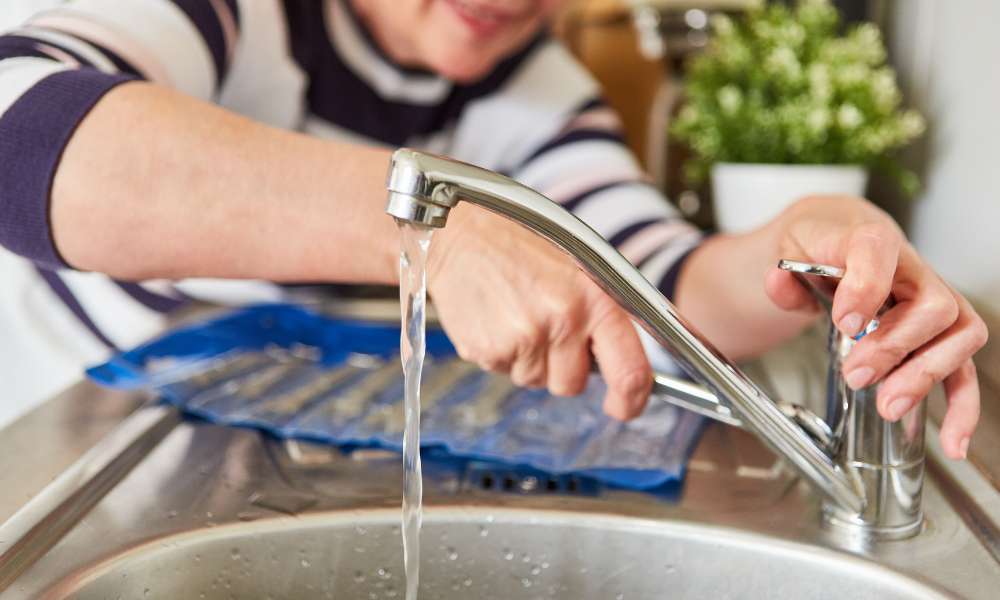
Removing a single handle kitchen faucet may seem like a daunting task, but with the right tools and guidance, it is a manageable DIY project that can save you time and money. Learning how to remove a single handle kitchen faucet not only empowers you to maintain your kitchen efficiently but also ensures that you can easily upgrade or repair your fixtures without the need for professional help. This article will walk you through each step of the process, highlighting important considerations and the benefits of undertaking this task yourself. By the end, you’ll have the confidence and knowledge to remove a single handle kitchen faucet with ease, ensuring your kitchen remains functional and up-to-date.
How Often Should I Replace My Kitchen Faucet?

The frequency of replacing a kitchen faucet depends on various factors such as the quality of the faucet, usage, and maintenance. Generally, a high-quality kitchen faucet can last for 10-15 years or even longer with proper care and maintenance. However, if you notice leaks, corrosion, or reduced water flow, it may be time to consider replacing your faucet sooner.
Can I Remove A Single Handle Kitchen Faucet Without Any Special Tools?

Yes, you can remove a single handle kitchen faucet without any special tools. Start by turning off the water supply to the faucet under the sink. Next, locate the set screw on the handle and use an Allen wrench to loosen and remove it. Once the set screw is removed, you can easily pull off the handle from the faucet.
Locating The Shut-Off Valves
Before you begin to remove a single handle kitchen faucet, the first crucial step is locating the shut-off valves. Typically found under the sink, these valves control the flow of water to the faucet. Turning off the hot and cold water supply at these valves is essential to prevent any leaks or water damage during the removal process. Ensuring the water is fully shut off will make the task safer and easier to manage. Familiarizing yourself with the location and operation of these valves can also be beneficial for future plumbing tasks and maintenance.
Handling Stubborn Connections
Dealing with stubborn connections when trying to fix a kitchen faucet can be frustrating and time-consuming. One effective tip is to use a penetrating oil or lubricant to help loosen corroded or stuck parts. Applying heat with a hairdryer or heat gun can also help expand metal components, making them easier to move. Additionally, using the proper tools, such as adjustable wrenches or pliers, can provide better leverage and grip for removing tight connections.
Using A Wrench To Disconnect The Lines

Once the connections have been loosened, using a wrench to disconnect the lines is the next step in how to remove a single handle kitchen faucet. An adjustable wrench is ideal for this task, as it can fit various sizes of nuts and bolts. Carefully position the wrench around the connection points and turn counterclockwise to unscrew the lines from the faucet. It’s important to proceed with caution to avoid stripping the threads or damaging the lines. Successfully disconnecting these lines will allow you to remove the faucet completely, paving the way for installing a new one or conducting necessary repairs.
Troubleshooting Stuck Handles
Troubleshooting stuck handles is often a common challenge when removing a single handle kitchen faucet. Start by accessing the handle set screw, usually located beneath a decorative cap or directly on the handle itself. Use an Allen wrench to unscrew the set screw and remove the handle carefully. If the handle is stuck due to corrosion or mineral deposits, apply a lubricant around the base and allow it to penetrate for several minutes. Gently wiggle or rotate the handle to loosen it, ensuring not to force it to avoid damaging the faucet components. Taking these steps patiently ensures you can successfully remove the handle without complications.
Lifting The Faucet Out
Once the handle is successfully maneuvered, the next step in how to remove a single handle kitchen faucet involves lifting the faucet out of its installation position. Locate the retaining nuts securing the faucet to the countertop underneath the sink. Utilize a basin wrench or adjustable wrench to loosen and remove these nuts carefully, ensuring not to drop them into the sink drain. With the nuts removed, gently lift the faucet assembly straight up and out of the mounting hole. If the faucet seems stuck due to silicone or plumber’s putty, gently rock it back and forth while lifting to break the seal.
Cleaning The Sink Surface
Cleaning the sink surface thoroughly after removing a single handle kitchen faucet is essential to prepare for any future installations or repairs. Use a putty knife or scraper to remove any leftover plumber’s putty or silicone from around the faucet mounting hole. Clean the area with a rag and mild soap to remove debris and ensure a smooth, clean surface for the next faucet installation. This step not only improves the aesthetics of your kitchen but also prevents any old residue from interfering with the performance and longevity of your new faucet.
Installing The New Faucet

1. Positioning The New Faucet
Begin by positioning the new faucet into the mounting hole on the sink. Ensure the faucet aligns properly with any existing holes and that it sits evenly on the sink surface. Once positioned correctly, maneuver the faucet into place so that it fits snugly against the sink.
2. Securing The Mounting Nuts
Securing the mounting nuts is crucial to stabilize the new faucet. Underneath the sink, thread the mounting nuts onto the faucet’s tailpieces and tighten them securely using a basin wrench or adjustable wrench. Be careful not to over-tighten, as this could damage the faucet or sink. Ensure the faucet remains level and stable throughout this process to prevent any future leaks or movement.
3. Reconnecting The Water Lines
Reconnecting the water lines is the final step in installing a new single handle kitchen faucet. Attach the water supply lines to the corresponding hot and cold valves underneath the sink. Use adjustable wrenches to tighten the connections, ensuring they are snug and leak-free. Once connected, turn on the water supply valves and check for any leaks around the connections. Adjust as necessary to achieve a tight seal.
The Final Thought
Removing a single handle kitchen faucet can be a straightforward task if approached with the right tools and knowledge. By following the step-by-step guide provided in this article, you can successfully uninstall your faucet without any hassle. Remember to turn off the water supply, gather necessary tools, and take your time to avoid any potential damage. Once you have removed the old faucet, you can proceed with installing a new one or making any necessary repairs. With patience and careful attention to detail, you can easily accomplish this DIY project and enjoy a fully functional kitchen sink.