

Discover the essential steps and techniques on how to effectively remove a kitchen faucet in our comprehensive guide. Whether you’re embarking on a kitchen renovation or simply need to address a dripping faucet, knowing how to remove the kitchen faucet is paramount. Uncover the benefits of mastering this skill, including the ability to enhance your kitchen’s appearance, improve functionality, and save on professional plumbing services. We’ll highlight the importance of this task and empower you with the confidence to undertake it yourself, regardless of your level of expertise. Join us as we break down the process into simple, actionable steps, enabling you to take control of your kitchen’s plumbing maintenance and upgrades.
How Long Does It Take To Remove A Kitchen Faucet?

Removing a kitchen faucet typically takes around 30 minutes to an hour, depending on the complexity of the faucet and your level of experience with plumbing tasks. The process involves turning off the water supply, disconnecting the water lines and mounting hardware, and then carefully removing the old faucet from the sink or countertop. It’s important to follow the manufacturer’s instructions or consult a professional if you’re unsure about any steps in the removal process.
Do I Need To Turn Off The Water Supply Before Removing The Faucet?
Yes, it is recommended to turn off the water supply before removing a faucet. This precaution helps prevent any water from leaking or spraying out unexpectedly during the removal process, which could cause damage or create a mess. By shutting off the water supply valves, you can ensure a smoother and cleaner removal process.
Can I Remove A Kitchen Faucet Without Any Prior Experience?

Yes, it is possible to remove a kitchen faucet without any prior experience, but it may require some patience and careful attention to detail. Before starting the removal process, I recommend watching tutorial videos or reading step-by-step guides to familiarize yourself with the necessary tools and techniques. Additionally, make sure to turn off the water supply to the faucet before beginning any work.
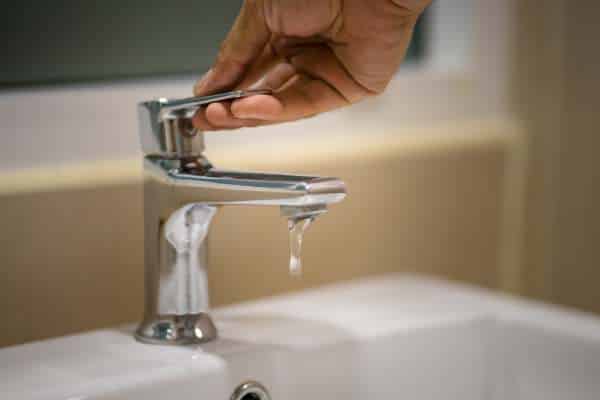
Shutting Off The Water Supply
Before embarking on the removal process, it’s crucial to start by shutting off the water supply. This step ensures a safe working environment and prevents any water damage during the removal process. Locate the shut-off valves beneath the sink and turn them clockwise to stop the flow of water to the faucet. Double-check that the water supply is completely off before proceeding with the next steps.
Disconnecting The Water Lines
Disconnecting the water lines from the faucet is essential for smooth removal. Using an adjustable wrench, carefully loosen the nuts connecting the water lines to the faucet. Be sure to have a container or towel handy to catch any residual water that may drip from the lines. Once the water lines are disconnected, set them aside in a secure location to prevent any tangling or damage.
Removing The Mounting Nuts
Removing the mounting nuts is a critical step in the process of removing a kitchen faucet. These nuts typically hold the faucet in place against the sink or countertop. Using a basin wrench or adjustable wrench, loosen and remove the mounting nuts located underneath the sink. Depending on the faucet’s design, there may be one or more mounting nuts to remove. Once all the mounting nuts are loosened, you can lift the faucet out of its position and proceed with any further maintenance or replacement tasks.
Gathering The Necessary Tools
Gathering the necessary tools is the initial step in the process of How To Remove Kitchen Faucet. Having the right tools on hand streamlines the entire process and ensures a smooth removal. Essential tools typically include an adjustable wrench, pliers, screwdrivers (both flathead and Phillips), plumber’s tape, and possibly a basin wrench for hard-to-reach areas. By assembling these tools beforehand, you’ll avoid unnecessary delays and frustration during the removal process.
Detaching The Faucet
Detaching the faucet is the next crucial step in the process. Begin by shutting off the water supply to the faucet to prevent any leaks or spills. Then, disconnect the water supply lines from the faucet using your wrench or pliers, ensuring you have a bucket or towel handy to catch any residual water. After disconnecting the water supply, proceed to remove the mounting nuts that secure the faucet to the countertop or sink. Depending on the type of faucet, you may need to use a basin wrench or additional tools to access and loosen these nuts effectively.
Cleaning The Area
Cleaning the area is an often-overlooked but essential step in the process of How To Remove Kitchen Faucet. Once the faucet is detached, take the opportunity to thoroughly clean the area underneath and around the mounting holes. Use a mild detergent or cleaning solution to remove any built-up grime, residue, or mineral deposits. Cleaning the area not only improves the aesthetics but also ensures a smooth and secure installation when it’s time to reattach the new faucet. Additionally, inspect the mounting surface for any damage or wear that may need to be addressed before installing the new faucet.
Inspecting For Damage
Before diving into the removal process, it’s crucial to inspect your kitchen faucet for any signs of damage or wear. Start by examining the faucet’s exterior for cracks, chips, or rust spots, which could indicate underlying issues. Next, check beneath the sink for leaks or water damage around the base of the faucet. Inspecting the connections and hoses for signs of wear or deterioration is also essential. Identifying any damage beforehand will help you anticipate potential challenges during the removal process and ensure a smoother transition to the new faucet.
Preparing For Installation
Proper preparation is key to a successful faucet removal. Begin by gathering the necessary tools and materials, including an adjustable wrench, plumber’s tape, and a bucket or towel to catch any water drips. Shut off the water supply to the faucet by turning off the valves located beneath the sink. Once the water is off, open the faucet to relieve any remaining pressure and allow the water to drain completely. Use this opportunity to disconnect the supply lines and any other connections securing the faucet in place. Taking these preparatory steps will streamline the removal process and minimize the risk of damage to your kitchen’s plumbing fixtures.
Testing The New Faucet

Begin by thoroughly cleaning the sink surface and removing any debris or old caulking. Carefully position the new faucet into place, ensuring that it aligns properly with the pre-drilled holes in the sink. Once in position, secure the faucet using the provided mounting hardware and hand-tighten the nuts underneath the sink. Reconnect the supply lines and any other connections, making sure to use plumber’s tape to prevent leaks. With the new faucet securely in place, turn on the water supply and check for any leaks or drips. Test the faucet’s functionality by running both hot and cold water to ensure proper operation. Completing these final steps will guarantee a smooth transition to your new kitchen faucet and provide peace of mind knowing that it’s installed correctly.
The Final Thought
Removing a kitchen faucet may seem like a daunting task, but with the right tools and guidance, it can be a manageable DIY project. By following the step-by-step instructions outlined in this article, you can successfully remove your old kitchen faucet and prepare for installation of a new one. Remember to turn off the water supply and take necessary safety precautions throughout the process. Once the old faucet is removed, inspect the area for any damage or issues that need to be addressed before installing a new one. Take your time, follow each step carefully, and soon you’ll have a fresh, functional kitchen faucet ready for use.