

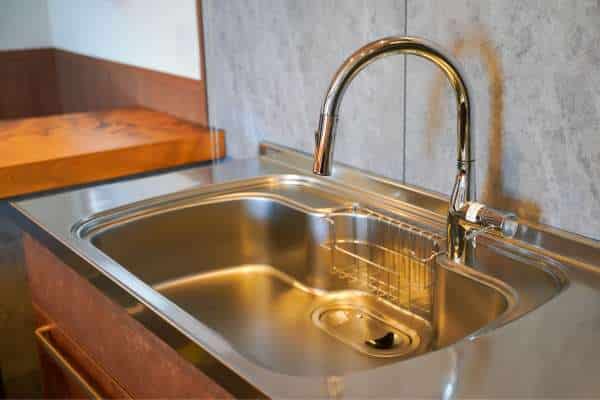
Unlock the secrets to a seamlessly efficient kitchen by mastering the art of removing your kitchen sink faucet. This essential skill not only enhances the aesthetic appeal of your culinary space but also ensures smooth functioning of your daily chores. Delve into the step-by-step guide to effortlessly Remove Kitchen Sink Faucet, empowering you to tackle maintenance and upgrades with confidence. Discover the importance of this process in maintaining a pristine kitchen environment, and unravel why you possess the capability to execute it flawlessly. Embark on this journey towards a more functional and visually pleasing kitchen, where every task becomes a breeze.
How Long Does It Take To Remove A Kitchen Sink Faucet?

The time it takes to remove a kitchen sink faucet can vary depending on the complexity of the installation and any potential complications that may arise. In general, the process typically takes around 30 minutes to an hour for someone with moderate DIY skills. However, if the faucet is old or rusted, or if there are any underlying issues with the plumbing connections, it could take longer.
Do I Need Any Specialized Tools For Faucet Removal?

Yes, you may need some specialized tools for faucet removal depending on the type of faucet you have and the complexity of the job. Some common tools that are often needed for faucet removal include an adjustable wrench, a basin wrench, pliers, screwdrivers, and possibly a pipe wrench. These tools can help you loosen and remove different parts of the faucet such as nuts, bolts, and screws.
Identifying Any Underlying Issues
Identifying any underlying issues before embarking on the task of removing your kitchen sink faucet is crucial. Conducting a thorough inspection can unveil potential problems such as leaks or corrosion, allowing you to address them simultaneously. By preemptively identifying and resolving these issues, you not only streamline the removal process but also prevent future complications, ultimately saving time and resources.
Ensuring Safety Equipment Availability
Ensuring safety equipment availability is paramount before embarking on the task of removing your kitchen sink faucet. Safety goggles, gloves, and other protective gear serve as essential safeguards against potential hazards such as sharp edges, flying debris, or exposure to harmful chemicals. Prioritizing safety not only protects you from accidents but also promotes a sense of confidence and peace of mind as you tackle the removal process with diligence and care.
Disconnecting Water Lines
Disconnecting water lines is a critical step in the process of removing your kitchen sink faucet. Before beginning the removal procedure, it’s imperative to shut off the water supply to the faucet to prevent any leaks or water damage. Once the water supply is turned off, carefully disconnect the water lines from the faucet using appropriate tools such as adjustable wrenches or pliers. Take care to follow manufacturer instructions and guidelines to avoid damaging the water lines or other components during the disconnection process.
Matching Specifications
Matching specifications ensures a smooth and hassle-free removal experience. Prior to beginning the task, ascertain that the replacement faucet aligns with the dimensions and configuration of your existing setup. This meticulous attention to detail prevents compatibility issues and ensures a seamless transition. By adhering to the specific requirements of your kitchen sink, you guarantee a successful removal process and facilitate effortless installation of the new fixture.
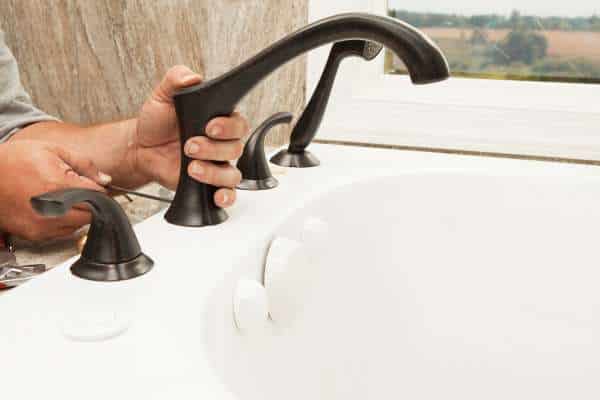
Unfastening Handles Carefully
Unfastening handles carefully is a pivotal step in the removal process, demanding precision and patience. Utilize appropriate tools and techniques to loosen the handles without causing damage to the surrounding components. By exercising caution and employing gentle maneuvers, you safeguard the integrity of the faucet and mitigate the risk of complications. This meticulous approach not only facilitates smooth removal but also preserves the functionality and aesthetics of your kitchen sink, ensuring long-term satisfaction and performance.
Detaching The Faucet
Detaching the faucet is a simple yet crucial process when it comes to installing a new Moen kitchen faucet. The first step is turning off the water supply to avoid any potential leaks or water damage. Next, use an adjustable wrench to carefully loosen and remove the nuts that secure the faucet in place. It’s important to have a bucket or towel handy to catch any excess water that may come out during this step.
Utilizing Lubricants
Using a lubricant can also protect your fixtures from damage during removal. By reducing friction and resistance, you decrease the risk of stripping screws or causing scratches on your faucet. Additionally, opting for a silicone-based lubricant can provide longer-lasting effects compared to traditional oil-based options. Don’t underestimate the power of these handy products when tackling DIY projects in your kitchen – they can save you time and frustration while ensuring that your plumbing remains intact throughout the process.
Preventive Measures For Future Corrosion
Preventive measures for future corrosion play a pivotal role in prolonging the lifespan of both the faucet and the surrounding fixtures. Prior to removal, it is advisable to inspect for any signs of corrosion or rust accumulation. Applying anti-corrosion solutions or sealants to vulnerable areas can effectively shield the faucet from environmental elements, mitigating the risk of deterioration over time. By integrating these preventive measures into the removal process, individuals can safeguard their investment and uphold the integrity of their kitchen infrastructure.
Conducting A Thorough Functionality Test

Conducting a thorough functionality test post-removal is equally essential in guaranteeing optimal performance. Once the faucet is removed, thoroughly inspect each component for any signs of damage or wear. Test the functionality of the faucet handles, spout, and sprayer to ensure smooth operation. Additionally, check for any leaks or irregular water flow, addressing any issues promptly to maintain the efficiency of your kitchen plumbing system.
The Final Thought
Removing a kitchen sink faucet may seem like a daunting task, but with the right tools and step-by-step approach, it can be easily accomplished. By following the instructions outlined in this article, you can successfully remove your old faucet and prepare for the installation of a new one. Remember to take your time and be patient during the process to avoid causing damage to your sink or plumbing. Once you have removed the old faucet, you will have a sense of accomplishment and satisfaction knowing that you completed the task yourself. So roll up your sleeves, gather your tools, and get ready to upgrade your kitchen sink with a new faucet!