

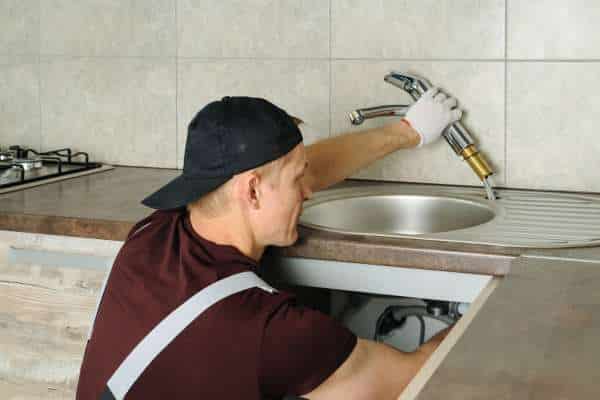
Discovering how to install a Moen kitchen faucet can transform your culinary space, offering both functional benefits and aesthetic appeal. Installing a Moen kitchen faucet is a straightforward process that can be accomplished with relative ease, even for those with limited plumbing experience. This guide will walk you through the essential steps to successfully install your Moen kitchen faucet, highlighting the importance of proper installation techniques and the reasons why tackling this project yourself is not only feasible but also rewarding. Whether you’re upgrading your kitchen or simply replacing an old fixture, mastering the art of installing a Moen kitchen faucet empowers you to enhance your kitchen’s functionality and style effortlessly.
How Long Does It Take To Install A Moen Kitchen Faucet?
The time it takes to install a Moen kitchen faucet can vary depending on the experience level of the person doing the installation and any complications that may arise during the process. On average, a straightforward installation of a Moen kitchen faucet can take anywhere from 30 minutes to an hour for someone with basic plumbing skills.
Do I Need To Hire A Professional Plumber?

Professional plumbers have the expertise and experience to accurately diagnose and address plumbing issues efficiently and effectively. They also have access to specialized tools and equipment that may be necessary for certain repairs. By hiring a professional plumber, you can ensure that the job is done correctly and avoid potential complications down the line.
Clean The Sink Surface
Before beginning the installation process, it’s crucial to ensure that the sink surface is clean and free of any debris or residue. A clean surface provides a solid foundation for the new faucet and helps prevent any potential leaks or damage. Start by thoroughly cleaning the area around the sink with soap and water, and then dry it completely with a clean towel. Taking this step will help ensure a smooth and secure installation process for your Moen kitchen faucet.
Shut Off Water Supply
Shutting off the water supply is a crucial step when installing a Moen kitchen faucet. This simple action can prevent potential water damage and ensure a smooth installation process. To do this, locate the main shut-off valve for your home’s water supply and turn it clockwise until it is fully closed. Additionally, turning on the faucet to release any remaining water pressure in the pipes can make the process easier. Remember to also drain any excess water from the lines by opening nearby faucets.
Motion-Sensor Faucets
Motion-sensor faucets offer a modern and convenient solution to traditional manual faucets, providing a touchless experience that promotes hygiene and water conservation. With their sensor technology, these faucets detect movement and automatically turn on and off, making them ideal for busy kitchens where hands are often dirty or occupied. Additionally, the ability to control water flow without needing to physically touch the faucet can help reduce the spread of germs, especially in households with multiple users.
Low Water Pressure
Dealing with low water pressure in your kitchen can be frustrating, but there are some simple solutions you can try before calling a plumber. One common culprit of low water pressure is a clogged aerator on your faucet. You can easily clean this by removing the aerator and soaking it in vinegar to break down mineral deposits. Another potential cause of low water pressure is a faulty or outdated kitchen faucet that may need to be replaced. Installing a new Moen kitchen faucet can not only improve water flow but also enhance the aesthetic appeal of your kitchen.
Loose Faucet Handle
A loose faucet handle can be both annoying and potentially damaging if not addressed promptly. When installing a Moen kitchen faucet, take the time to secure the faucet handle properly to prevent it from becoming loose over time. Tighten the handle using the provided hardware, and check for any signs of wobbling or instability. Opting for a Moen kitchen faucet known for its durable construction and sturdy handle design can also help prevent future issues with loosening. By addressing this concern during installation, you’ll ensure a reliable and long-lasting faucet that enhances both the functionality and aesthetics of your kitchen.
Install The New Faucet Base
The process of installing a new faucet base may seem daunting at first, but with proper guidance and tools, it can be a straightforward task. Position the new base correctly and secure it using the provided hardware. Finally, reconnect the water supply lines and test for any leaks before enjoying your newly installed Moen kitchen faucet.
Connect The Water Supply Lines
Once the faucet base is securely installed, it’s time to connect the water supply lines. Begin by attaching the hot and cold water lines to their respective valves underneath the sink. Use adjustable wrenches to tighten the connections, ensuring they are snug but not overly tightened to avoid damaging the fittings. Properly connecting the water supply lines is essential for ensuring a steady flow of water to your Moen kitchen faucet. With the water supply lines securely in place, you can proceed with the rest of the installation process confidently, knowing that your faucet will operate smoothly and efficiently.
Install The Faucet Handles

Installing the faucet handles is a crucial step in the process of setting up your Moen kitchen faucet. Begin by carefully unpacking the components and familiarizing yourself with the handle assembly. Utilize the provided instructions to correctly position and secure the handles onto the faucet body, ensuring a snug fit. Properly installed handles not only contribute to the aesthetic appeal of your kitchen but also ensure smooth operation and durability over time. Take care to tighten all connections securely to prevent leaks and ensure optimal performance.
Attach The Sprayer
To remove an old kitchen faucet and attach a new sprayer, you’ll need a few essential tools: adjustable wrench, pliers, and plumber’s putty. Start by turning off the water supply to the faucet to prevent any leaks or spraying water. Next, use the adjustable wrench to loosen and disconnect the water supply lines from the faucet. Once disconnected, use the pliers to loosen and remove any mounting nuts holding the faucet in place
The Final Thought
Installing a Moen kitchen faucet can be a straightforward process with the right tools and guidance. By following the step-by-step instructions provided in this article, you can successfully upgrade your kitchen with a new faucet. Remember to turn off the water supply before beginning and take your time to ensure each component is properly connected. Once installed, test the faucet for leaks and functionality to ensure it is working correctly. Enjoy the convenience and style of your new Moen kitchen faucet for years to come!