
Removing a Moen kitchen faucet may seem like a daunting task, but with the right guidance, it can be a straightforward and rewarding DIY project. Learning how to remove a Moen kitchen faucet not only saves you the cost of hiring a plumber but also gives you the satisfaction of tackling home improvements on your own. This process is important for anyone looking to replace a faulty faucet, upgrade to a more modern design, or perform necessary repairs. By following the proper steps, you can ensure a smooth and successful removal, allowing you to maintain or enhance the functionality and aesthetics of your kitchen.
What Should I Do If My Faucet Is Stuck?

You may need to disassemble the faucet to get a closer look at what’s causing it to be stuck. Make sure to turn off the water supply before attempting this and refer to the manufacturer’s instructions for guidance on how to properly disassemble and reassemble the faucet. If you’re not comfortable doing this yourself, it’s best to call a professional plumber who can help diagnose and fix the issue for you.
How Long Does It Typically Take To Remove A Faucet?

The time it takes to remove a faucet can vary depending on the complexity of the installation and the condition of the existing faucet. In general, a straightforward removal process can take around 30 minutes to an hour for someone with basic plumbing skills. This involves turning off the water supply, disconnecting the water lines, and unscrewing the faucet from the sink or countertop.
Locating The Mounting Nuts
Remember that tightening the mounting nuts properly ensures that your faucet remains stable and leak-free for longer. It’s also important to use the correct tool for the job, as using an ill-fitting wrench can damage the nuts or cause leaks in the future. Taking the time to locate and tighten these nuts is a simple yet effective way to maintain your kitchen faucet and prevent any unnecessary issues down the line.
Using Penetrating Oil
One of the challenges you might face when you remove a Moen kitchen faucet is dealing with corroded or stuck parts. Applying penetrating oil is an effective solution to this problem. Penetrating oil seeps into the threads of the nuts and bolts, loosening any rust or mineral build-up. Spray the penetrating oil on the mounting nuts and give it some time to work its magic. This step is essential for making the process of removing your Moen kitchen faucet smoother and less frustrating. Using penetrating oil can significantly reduce the effort needed to loosen stubborn parts, making your DIY project more manageable.
Removing The Handle
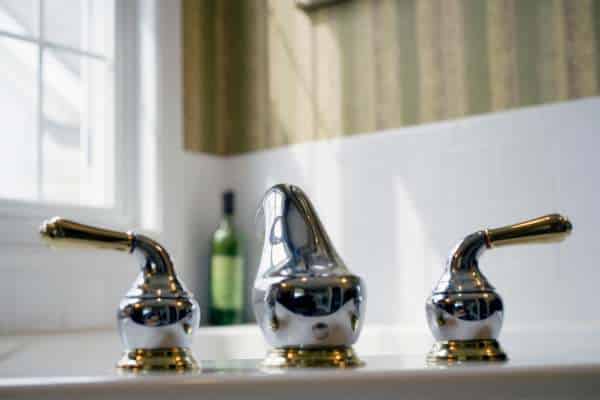
1. Identifying The Type Of Handle
Before you begin the process of removing your Moen kitchen faucet handle, it is crucial to identify the type of handle you have. Moen kitchen faucets typically come with either a lever handle or a knob handle. Knowing the specific type of handle is important because it determines the removal method. Carefully inspect your faucet and consult the user manual if necessary to ensure you have the correct tools and instructions for your handle type.
2. Removing A Lever Handle
To remove a lever handle from your Moen kitchen faucet, start by locating the set screw. The set screw is usually found at the base of the lever handle, sometimes concealed by a small decorative cap. Use an Allen wrench to loosen and remove the set screw. Once the screw is removed, gently pull the lever handle off the faucet. If the handle resists, apply a bit of lubricant and try again. Removing a lever handle is straightforward when you follow these steps, making it easy to proceed with any repairs or replacements.
3. Removing A Knob Handle
For those dealing with a knob handle, the process of removing your Moen kitchen faucet handle is slightly different. Begin by locating the cap on top of the knob, which can be pried off with a flathead screwdriver. Underneath the cap, you’ll find a screw that secures the knob handle to the faucet. Use a Phillips screwdriver to remove this screw. Once the screw is out, gently pull the knob handle away from the faucet. This method ensures that you can effectively remove a knob handle, allowing you to proceed with any further disassembly or maintenance tasks.
Handling Stubborn Faucets
Handling stubborn faucets is often the most challenging part of learning how to remove a Moen kitchen faucet. Even with penetrating oil, some faucets may still resist removal due to prolonged use or severe corrosion. In such cases, patience and the right tools, like a basin wrench or pliers, are essential. Applying steady pressure and gentle movements can help avoid breakage. If the faucet remains immovable, it may be necessary to seek professional assistance to prevent further damage. Properly handling these difficult faucets ensures the successful and safe removal of your Moen kitchen faucet, paving the way for new installations or repairs.
Cleaning The Sink Area
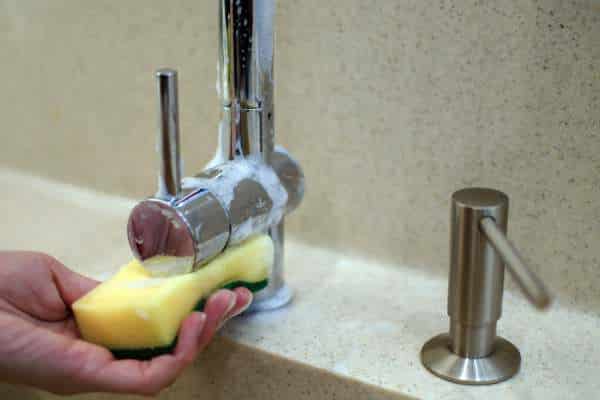
Cleaning the sink area before removing a Moen kitchen faucet is not only beneficial for hygiene but also for ease of access during the removal process. Over time, grime, mineral deposits, and other debris can accumulate around the base of the faucet, making it challenging to work efficiently. Before attempting to remove the faucet, use a mild cleaner and a soft brush or sponge to scrub away any buildup around the sink area. This will not only improve visibility and access to the mounting nuts but also ensure a cleaner workspace for the removal procedure.
Limited Access Space
Limited access space can present a challenge when removing a Moen kitchen faucet, particularly in cramped or confined areas. In such cases, it’s essential to approach the removal process with patience and strategic planning. Begin by clearing out any unnecessary clutter from the surrounding area to create more room to maneuver. Additionally, consider using specialized tools such as basin wrenches or adjustable wrenches with swivel heads to navigate tight spaces more effectively. Taking the time to assess the available space and plan your approach accordingly can help streamline the removal process and minimize frustration.
Utilizing Proper Lighting
Proper lighting is essential when removing a Moen kitchen faucet, as it allows you to accurately locate and assess the mounting nuts and other components. Before beginning the removal process, ensure that you have adequate lighting in the area under the sink. Natural light from a nearby window or bright overhead lights can help illuminate the space, making it easier to see and work with small components. Additionally, consider using a flashlight or headlamp to provide focused lighting in hard-to-reach areas. By utilizing proper lighting, you can avoid potential mistakes and safely remove the faucet with precision.
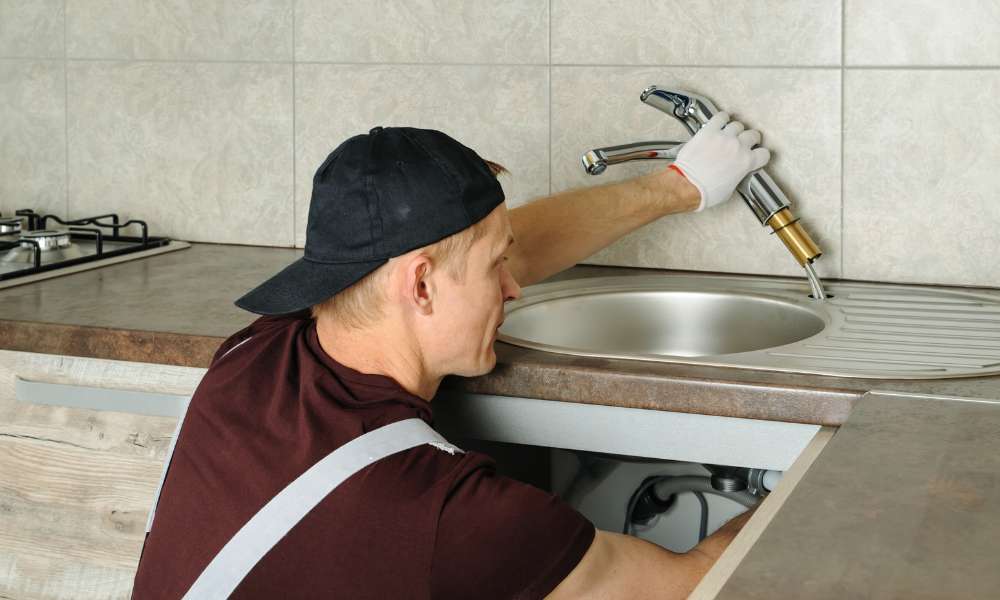
Proper Technique For Disconnecting
Disconnecting the various components of a Moen kitchen faucet requires a proper technique to avoid damaging the fixture or surrounding plumbing. Start by disconnecting the water supply lines from the faucet using a wrench or pliers. Turn off the water supply valves and use a towel to soak up any remaining water in the lines. Next, carefully detach the sprayer hose, if applicable, by pressing the release button and pulling the hose away from the faucet. Finally, use a wrench to loosen and remove the mounting nuts securing the faucet to the sink. Take care to support the faucet from above as you disconnect it to prevent it from falling and causing damage. By following these steps and employing the proper technique, you can safely and effectively disconnect a Moen kitchen faucet.
The Final Thought
Removing a Moen kitchen faucet may seem like a daunting task, but with the right tools and guidance, it can be done efficiently. By following the steps outlined in this article and exercising patience, you can successfully remove your old faucet and prepare for a new installation. Remember to turn off the water supply before starting the removal process to prevent any potential leaks or accidents. Additionally, seeking help from a professional plumber is always an option if you encounter difficulties beyond your expertise. Take the time to properly remove your Moen kitchen faucet to ensure a smooth transition to a new one that suits your needs and style.